Slide Types
We’ll briefly go over the slide types you can use to bring your presentation to life. Some slide types may convey your ideas better than others, but we’ll help guide you on when to use each slide type and tricks we’ve created to use slide types in creative ways. So let’s get started!

Intro Slides #
Like every great essay or presentation, you will need an introduction. You MUST start your presentation with an Intro Slide on your timeline- All other slides will be greyed out until you add an Intro Slide. This is the welcome screen your viewers will see when they first click on your presentation link.
Pro Tip: To capture their attention we highly recommend putting their name on the screen using the Add Personalization Button on the slide editor screen.
Text Slides #
The text slides are a good way to add inflection to a presentation. When accompanied by a voice over, your presentation is sure to gain attention and significance. By including key words on screen you are essentially adding emphasis to your topics. Include powerful background imagery to add an extra “oomph!”

Example Voiceover: “Global warming is devastating Communities and ravaging food supply.” Rather than typing the entire sentence on screen, we can emphasize “Devastating Communities.”
Button Interactions #
Button Interactions are a great way to keep engagement levels high by asking them to interact with their screen. You can ask probing questions to get your audience thinking about the problem your product or service solves, answer yes or no questions, or if they’d like to skip a section to move on!
What are Button Targets:
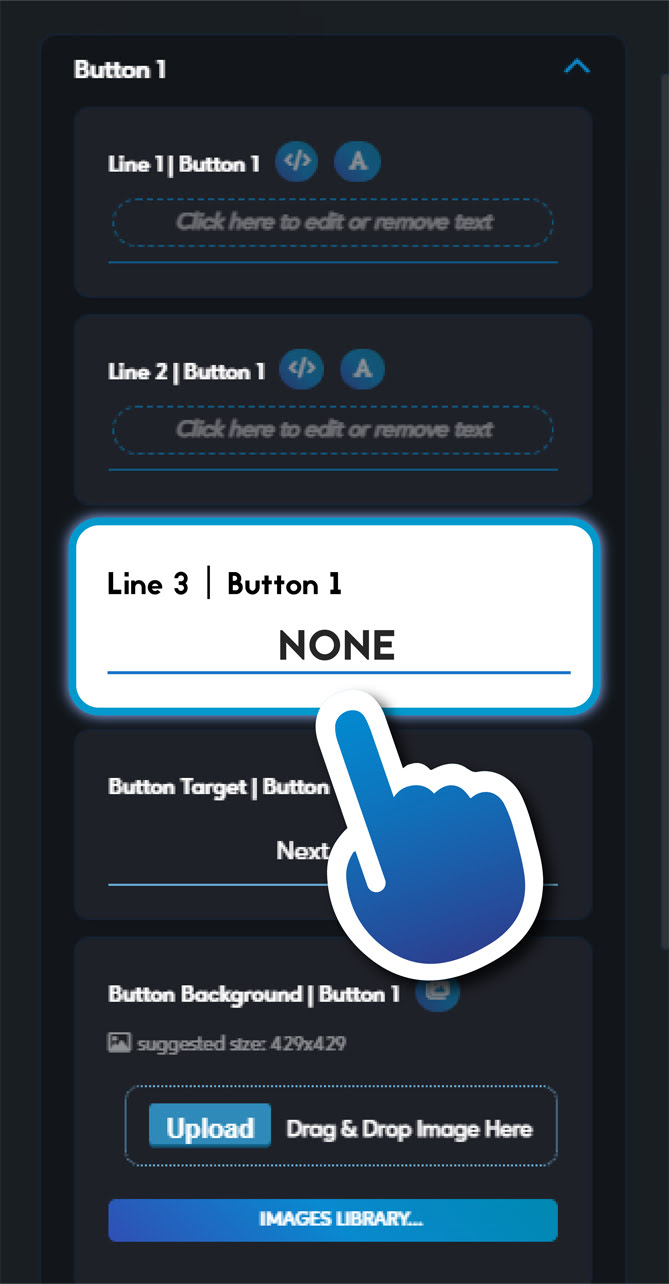
Button targets determine what happens when the viewer clicks a button. This allows you to make your presentation reactive to wrong answers, or let the viewer choose what they want to see. Each button will have a Button Target with a dropdown menu to choose one of the following:
– Next Slide: Each button is set to this by default and will advance to the next slide in the linear timeline.
– Any Slide on the Timeline: You can skip to any slide on your timeline. We use this to make the presentation answer differently based on their choice to a question!
– None: This takes away the interactive capability. If all the buttons are set to None, then the presentation will automatically advance when the voiceover is complete. We use this to demonstrate product pictures or names of companies we work with!
Cool tips about Button Slides:
- – Set all “Button Targets” to “NONE”. Doing this will disable the interactive button and allow you to use the animation without the viewer being able to click on the slide. The presentation will automatically continue to the next slide when the narration is complete.
- -When editing a button slide, delete the button text and insert an image with logo(s) or product pictures embedded. We recommend using a 3rd party software such as Adobe Photoshop. You can use our image editor to adjust your image size and placement.
- –Button slides act the same way menu slides do. They only look different! So you can use either or when making your presentation.
Menu Slides #
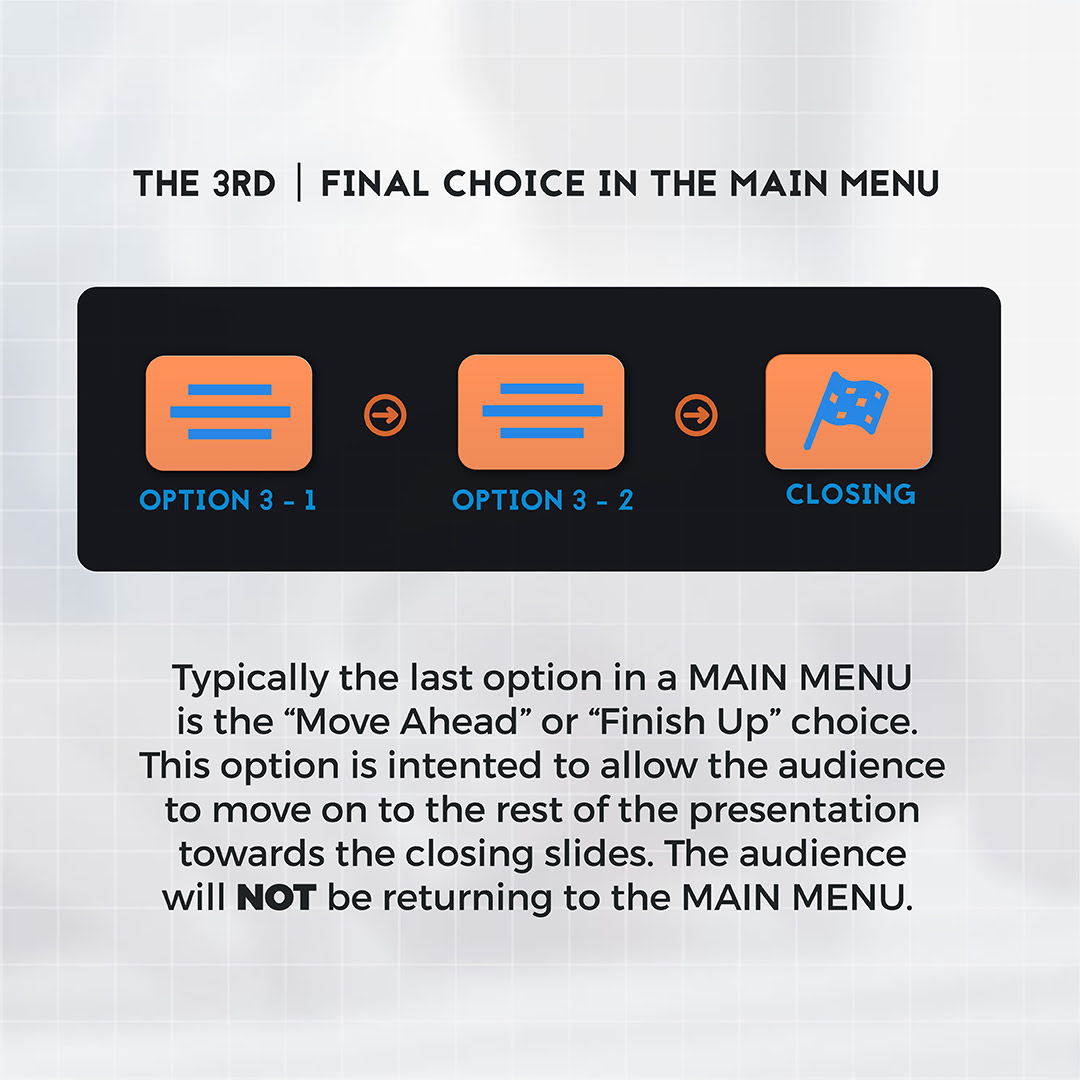
Probably our most complex slide due to its ability to serve as the “Nexus” of your presentation. Menu slides function as a “Fork in the road” for your viewers; meaning they have the ability to choose where they want to go and what content they want to view. Keep in mind that you want to give the viewer options so they can learn about what they’re interested in to make the sale and skip the content that will lose their attention, but be careful not overwhelm them with too many choices.
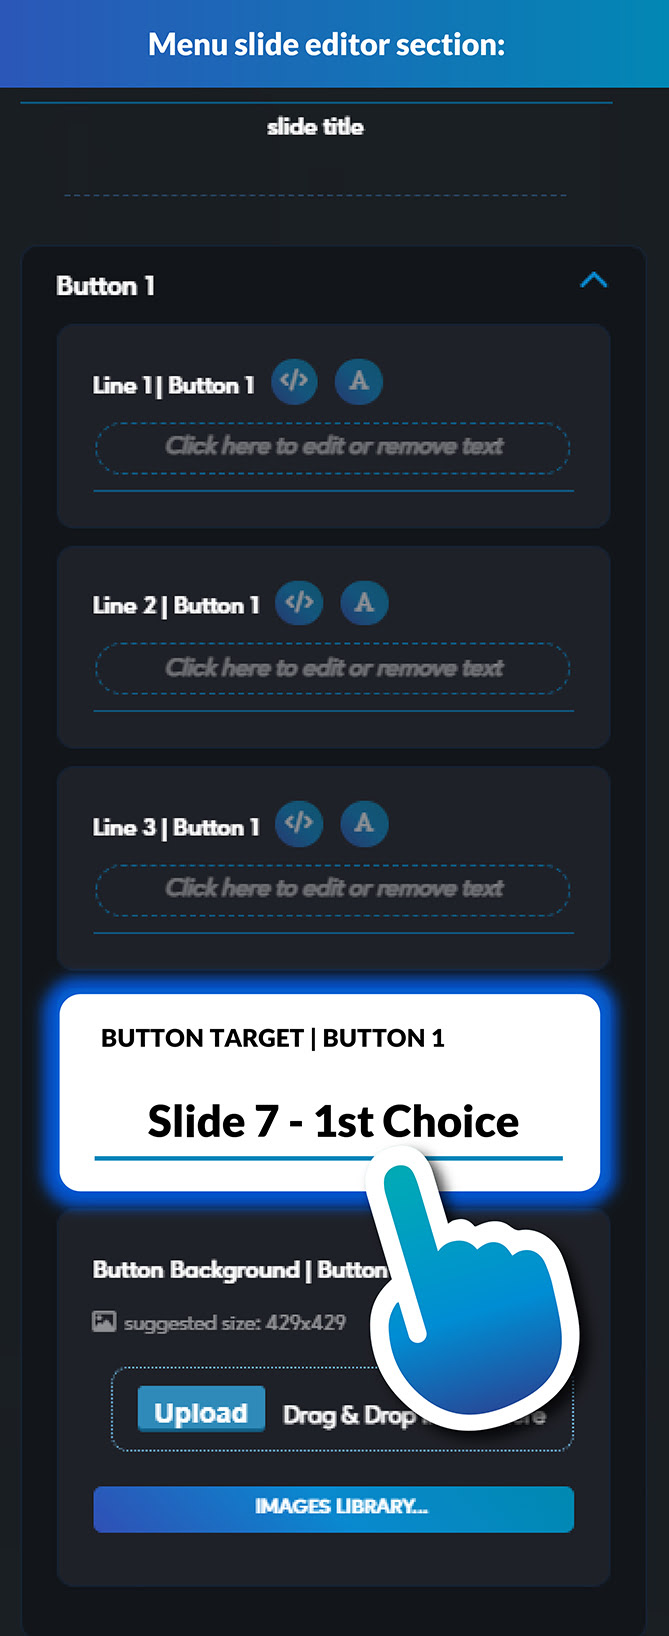
Like every other slide type, you can edit text and imagery within the Menu Slide. The Menu Slides function the same way as button slides, they only differ in the way they appear. So find the “Button Target” field in the customization panel on the left of the screen and select the slide you’d like to send the viewer to when they click the designated button.
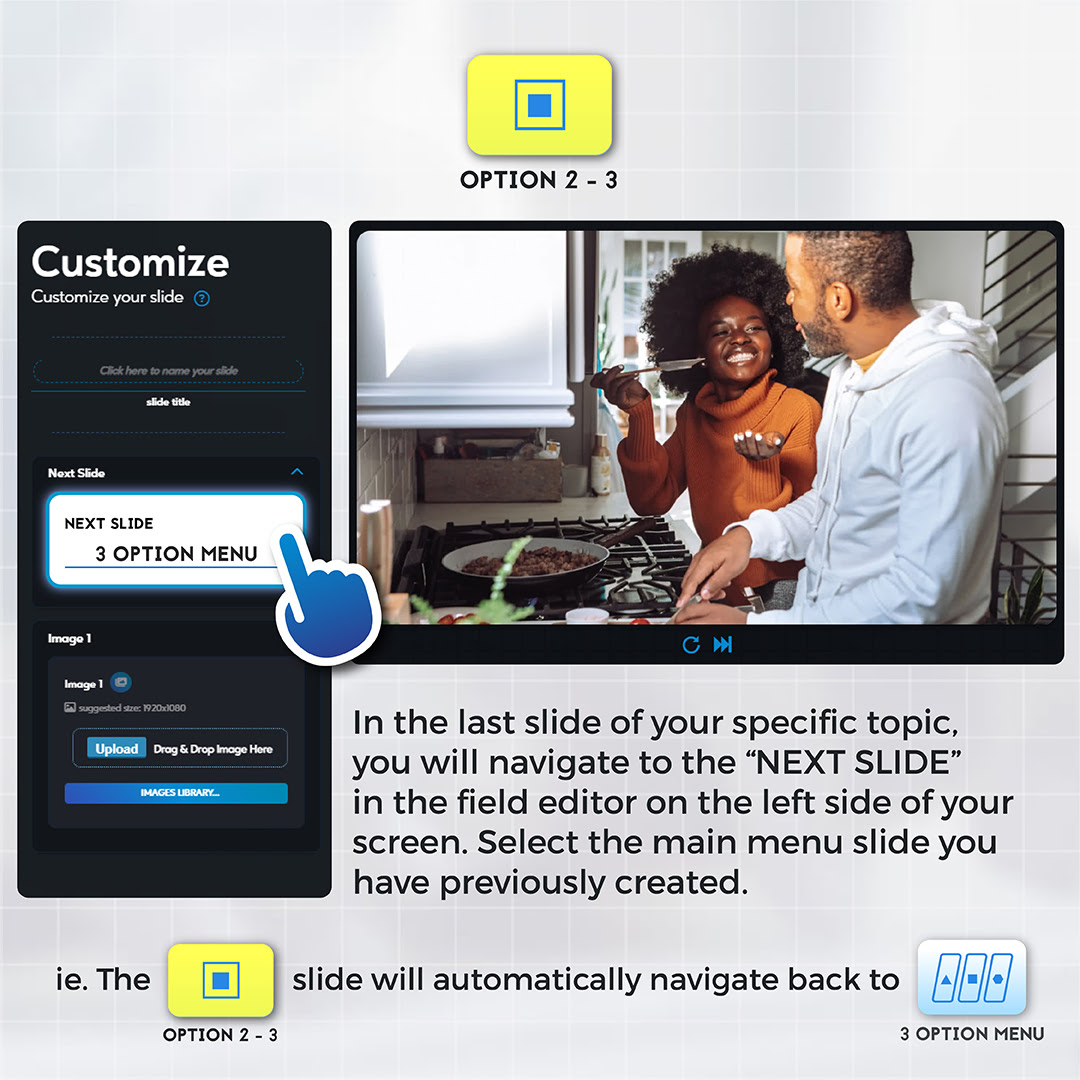
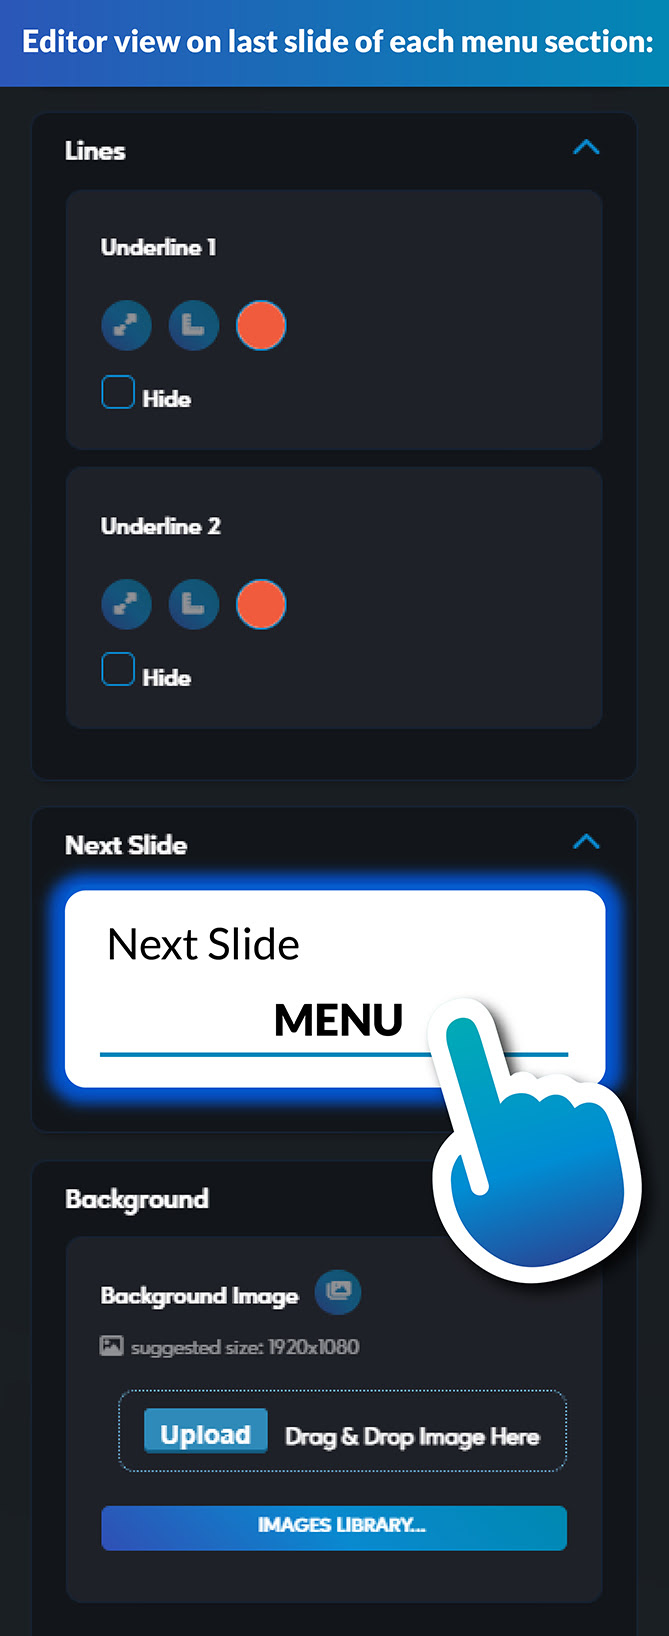
Important note: Remember to guide your audience back to the Menu Slide by pointing the last slide of that particular section back to the Menu on the “Next Slide” or “Button Target” fields. Doing this will automatically send the viewer back to your Menu when they’ve finished a section, giving them the opportunity to select a different option to view.

Logo Reveal Slides #
Logo Reveal Slides ask the viewer to interact with their screen to reveal the image/ logo underneath. We currently have 3 logo reveal types:
1.) Rub Your Screen
2.) Press And Hold
3.) Logo Shatter

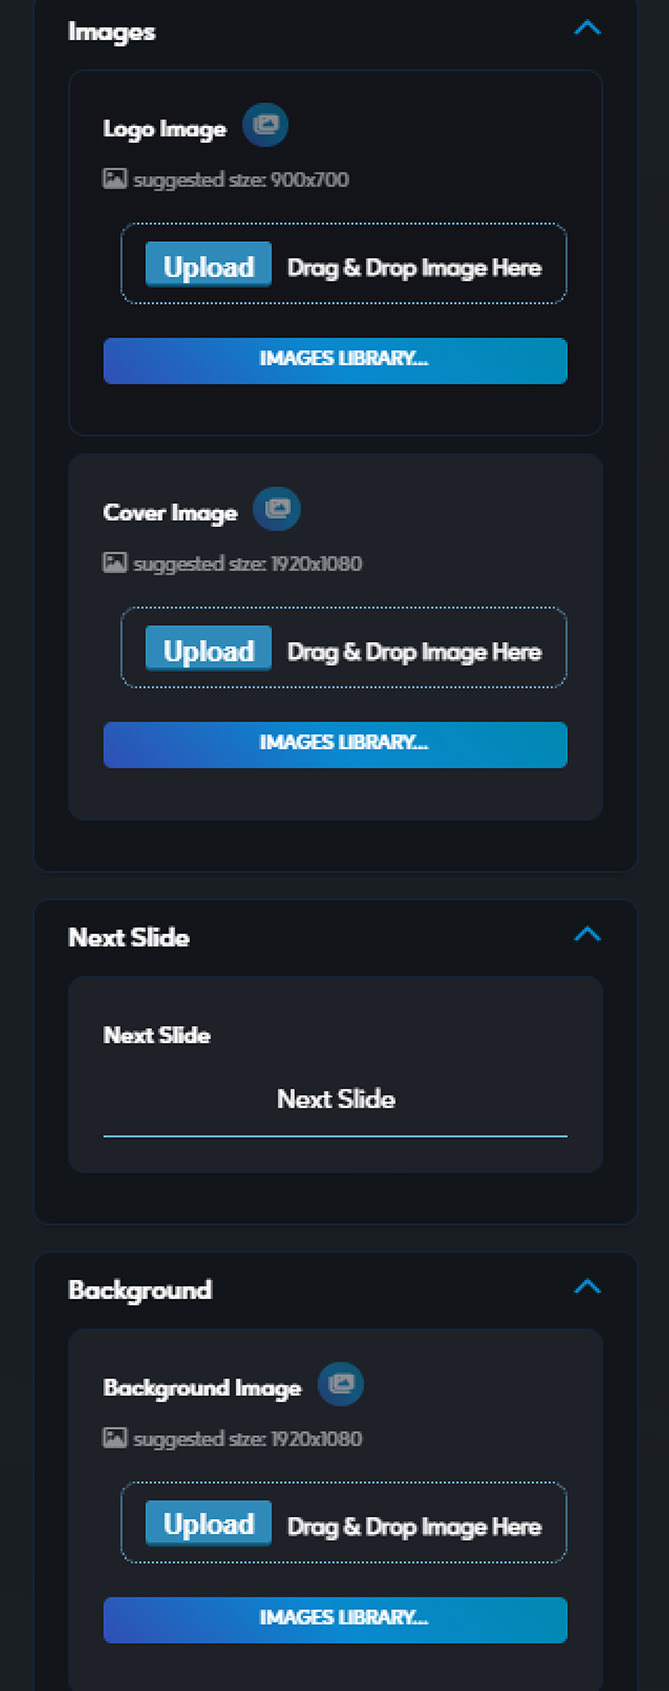
There are three images that can be changed within the logo reveal slides:
1.) Logo Image (its best to use .pngs files here): This is your logo or product image that you’re viewer will see after the reveal.
2.) Cover Image: the image that will disappear when the viewer interacts with the screen. This shows behind the instruction text (Press and Hold Your Screen).
3.) Background Image: the image behind your logo or product image after the reveal.

Interactive Sliders
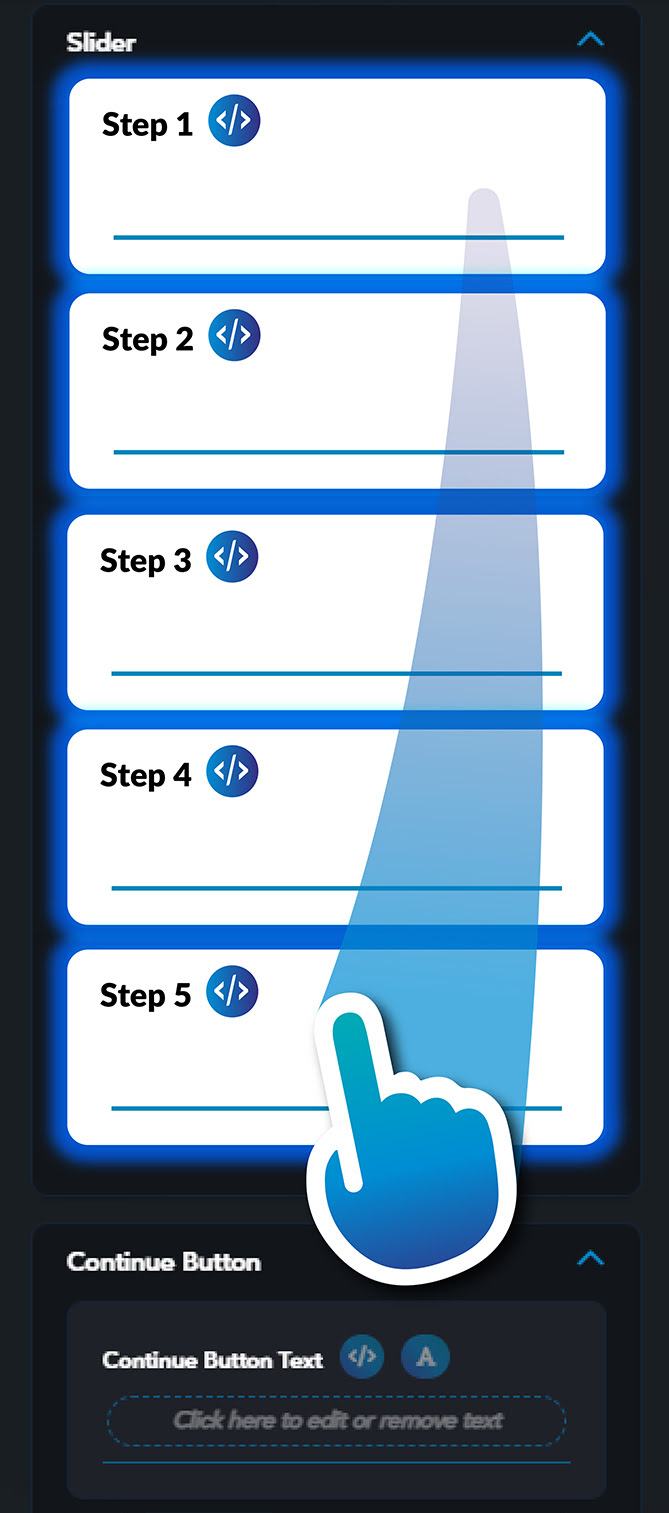
Our Interactive Slider slides let the viewer drag the button to their choice, then click to move ahead. You can choose between 3, 5, and 7 ticks on the slider, all of which you can add custom text to.
Great question examples to use here are:
“How much would your income need to grow to have the lifestyle you want?”
“What percentage of human pollution contributes to global warming?”
“How many people do you think you can bring on to your team?”
Other Cool Stuff
Timeline Slide #
Having a Timeline Slide is a great way to tell your audience the order of events or explain a step by step process of your company. This slide cannot be timed but instead will play for the length of the narration. So if you’d like to give your viewer time to read, we recommend letting the narration record in silence after you’ve said your line!
Copy & Paste Slide
The Copy & Paste slide lets you enter any URL or text that you’d like your viewer to visit or use later. When the viewer clicks the button, that URL or text will automatically be copied to their device’s clipboard so they can paste it in their web browser after they’ve finished the presentation.
Video Player Slide
See, we don’t completely hate videos 😉
Simply copy and paste a YouTube link and choose whether you’d like a Skip button to display on screen so your viewer can move on if they don’t want to finish the video.
Pro Tip: We HIGHLY recommend keeping videos under 90 seconds to keep your viewer’s attention.
Closing Slides #
Congratulations, you’re at the home stretch! Every presentation must end with at least one closing slide, but you can add multiple if you’d like! Each option will text or email the sender a notification when the viewer reaches that point so you know when and how to follow up.
We currently have 3 types of closings:
1.) Call to Action
2.) Thank you
3.) Contact Form
Pro Tip: We recommend adding a 3 Button Slide w/ Header followed by add all 3 Closing options to make a Closing fork! Select the Button Targets on the 3 Button Slide to each closing option so the viewer can choose how they want to move forward.

Call to Action #
What is a “call to action”? Your call to action is the part when you tell your audience what you’d like them to do once they finish your presentation. The simplest example of a call to action is “Buy now!” or “Click to Subscribe!”
Our Call to Action slide puts a button on the screen and when clicked your viewer will leave the presentation and be brought to the URL of your choice. Below the Get Started button is customizable thank you text and the sender’s contact information.
Doing this allows your audience to have direct access to your website without the need to search for it!
Contact Form #
It’s exactly as it sounds!
the Contact Form slide is simply a way for your viewer to fill in their contact information with the best time to reach them, no more back and forth trying to get ahold of them! You get notified with their name, phone number, email address, and the preferred date and time that’s best to contact them!
Thank You #
Much like any kind of presentation or meeting, it’s important to thank your audience for their time! A sincere appreciation will give your audience a feeling of importance, a feeling that you are very aware that their time is precious. This slide doesn’t have an interaction and is often used if the viewer chooses that they’re not interested at this time.


