What Is A Dropdown Menu? #
A dropdown menu is a list of options to choose from that pops up when you click on an icon. It’s handy because it doesn’t take up much space on the screen but still gives the viewer control to see what they’d like. You see it a lot on websites and in apps for picking things like what page of a website to visit. For myiDecide, we use a ☰ menu icon. Once a viewer clicks the ☰, the presentation will display a list up to 6 choices.

How To Create A Dropdown Menu #
We recommend having a completed presentation before adding a dropdown menu. You won’t be able to indicate where the dropdown menu buttons should go if you don’t have the slides finalized. Assuming you have a complete presentation, let’s dive in. To create a dropdown menu in your presentation, you will need to navigate back to the introduction slide at the beginning of the presentation in your timeline.
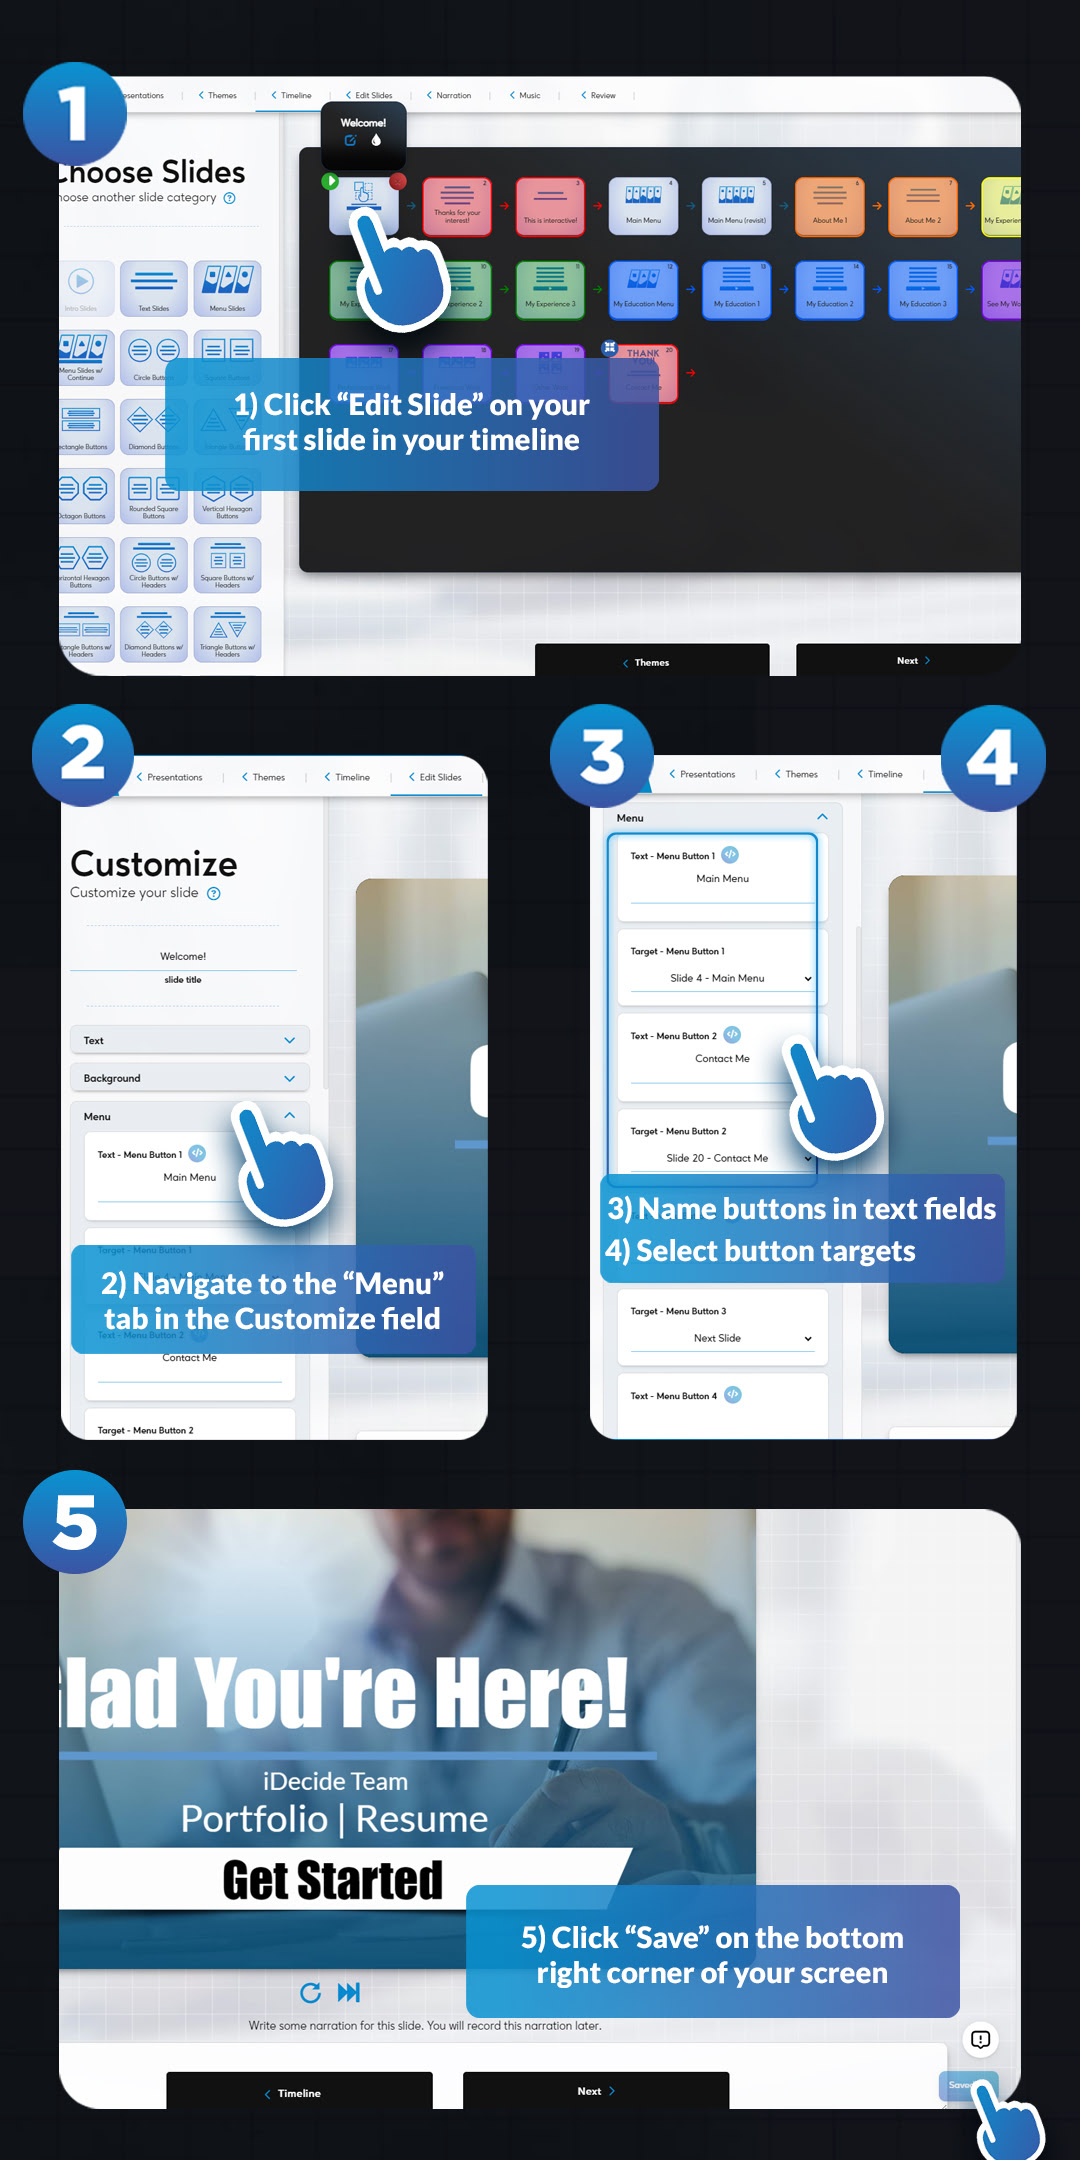
1) Click “Edit Slide” on your Intro Slide at the beginning of your timeline.
2) Navigate to the bottom of the “Customize” column on the left side of the screen and click the “Menu” tab to reveal the fields.
3) Type the display text for the button in the “Text” fields. This will be what the viewer sees in the button when they click the dropdown menu.
4) Select the slide where each button should go in the “Target” fields.
• In this example we will be making a “Main Menu” button sending the viewers to our Main Menu slide and a “Contact Me” button to send the viewer to the end of the presentation so they have access to our call to action.
5) Once you are satisfied with your menu options, click “Save” in the bottom right corner to ensure your progress isn’t lost.

Dropdown Menu iDeas #
This menu is meant to be a way for your viewer to navigate your presentation and jump to the part they’re most interested in seeing. The options in your menu should relate to the major points in your presentation.
We recommend at least adding a button for each closing slide in your timeline so your viewer can close when they’re ready, but here are some of our favorites:
- Main Menu
- Schedule a Call (target: Contact Form closing slide)
- Buy Now (target: Call to Action closing slide that links to your purchase page)
- Restart the Presentation (target: Intro Slide)
Testing Your Dropdown Menu #
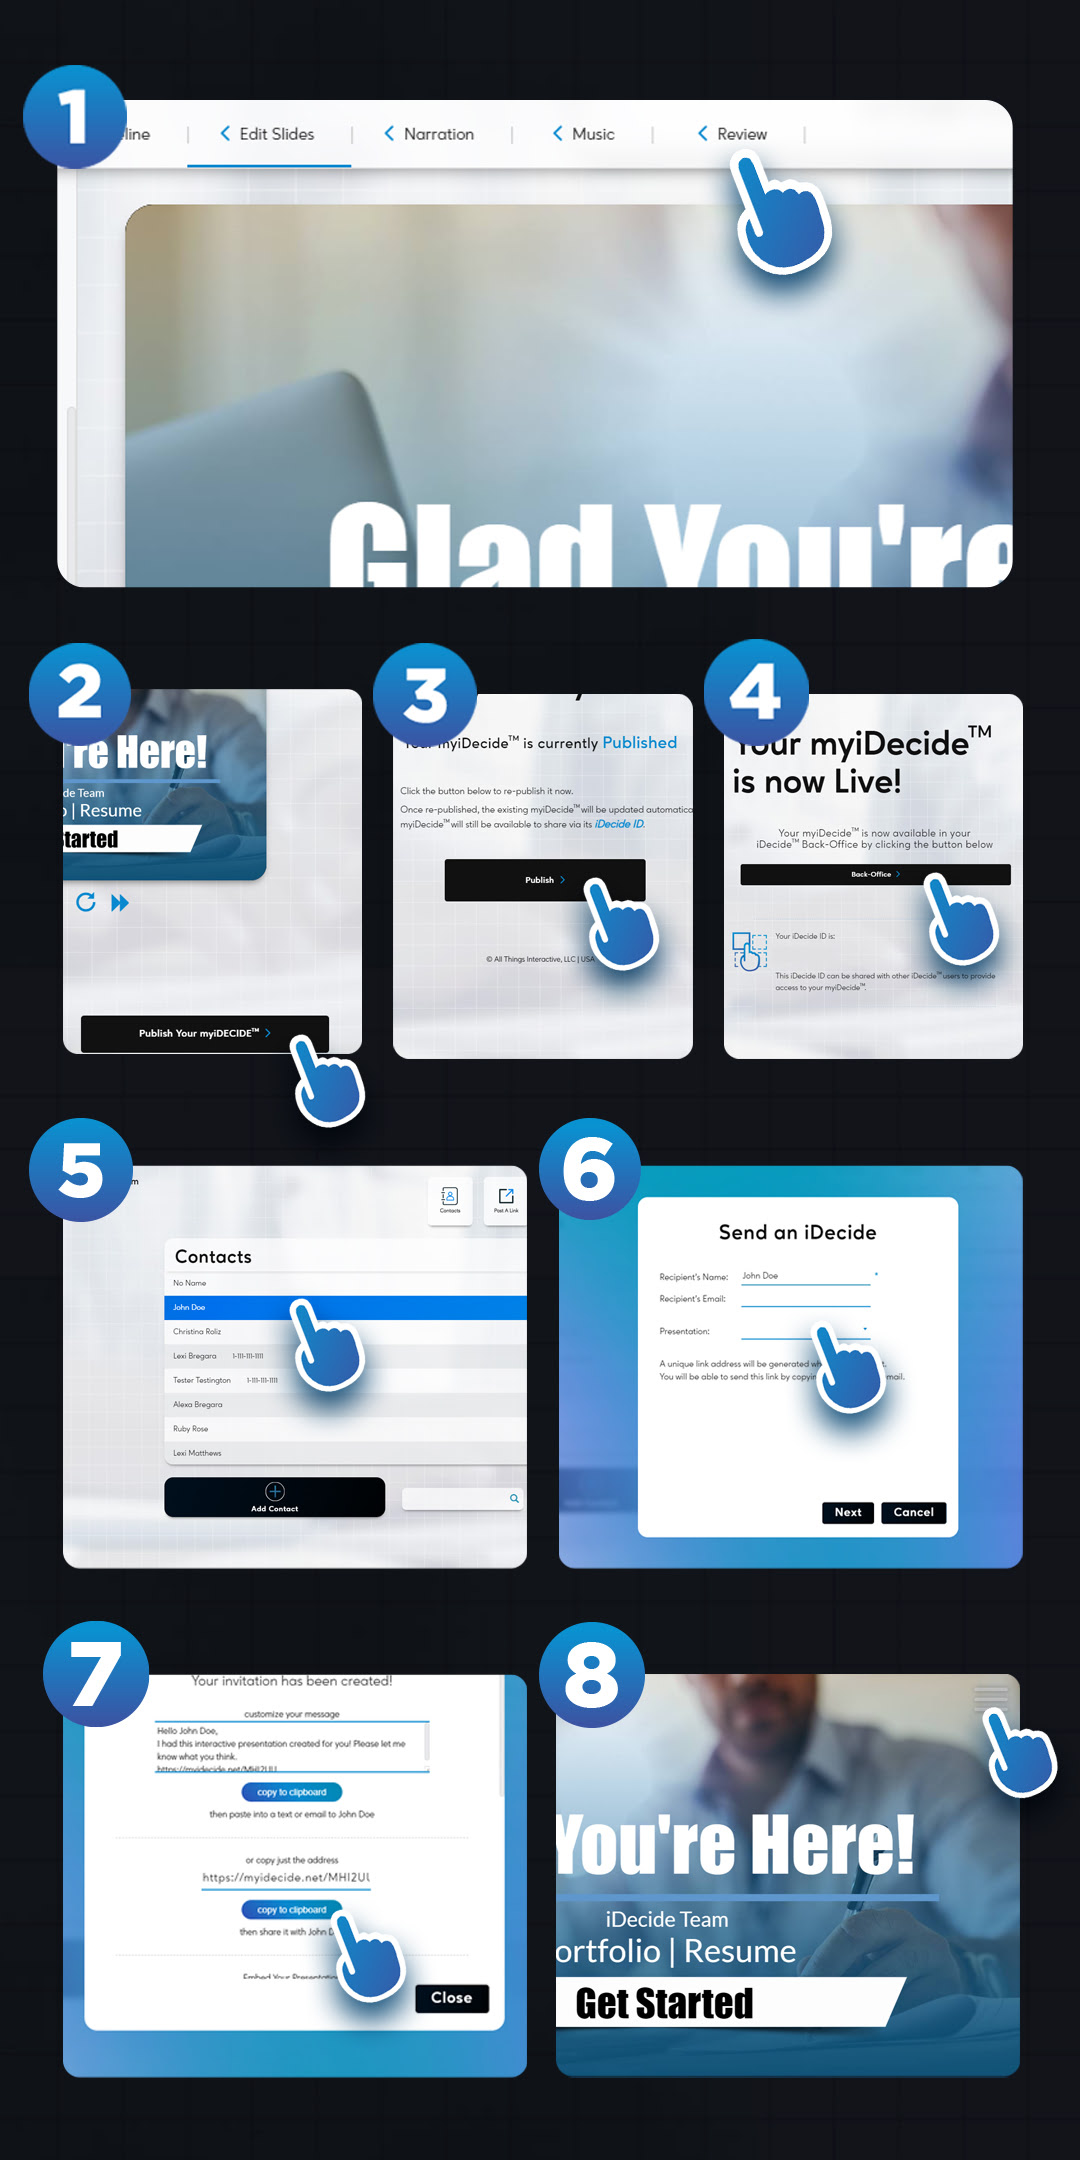
Now that you have created a Dropdown Menu, you’ll want to test it! The only way to test your dropdown menu is by publishing the presentation and creating a link to view it as if you were sending it to a prospect. Here’s how to publish and create a link:
1) Click the “Review” tab located at the top of the screen.
2) Click “Publish Your myiDecide” at the bottom of the screen.
3) Confirm you’d like to publish by clicking the “Publish” button again.
4) Navigate to your back office and select Contacts.
5) Add yourself as a contact and click your name to reveal the Send an iDecide pop-up.
6) Select the presentation that contains your drop down menu and click “Next.”
7) Copy just the URL address.
8) Paste the link into your browser and Voila! Look at the top right of your presentation and you will see the ☰ icon. Click the ☰ icon and make sure your buttons are there and take you to the correct slides.
Congratulations! You have successfully created and tested your dropdown menu!

Important Notes #
- You may have up to 6 buttons per presentation.
- Leaving a text field empty will cause the button to not appear in the dropdown.
- The dropdown menu is only seen when the presentation is published & live on your generated link. When in the “Edit Slides” & “Review” sections, the dropdown menu will not be visible.