Before we get started… #
The knowledge base you are currently viewing is ONLY for iDecide Standard users who want to use Zapier to connect to a CRM or other third party app to create and store personalized links, automate responses, or track what the viewer chose during the presentation If you want to use Zapier with your iDecide Pro subscription to track the choices and outcomes of presentations you’ve built on the myiDecide platform, please visit this knowledge base: Zapier Integration for myiDecide
What is Zapier? #
Zapier is an online tool that automatically connects two or more software applications. This will allow you to create automated workflows to connect your iDecide Back Office with other apps that support Zapier connectivity.
While iDecide currently gives you analytics, notifications when a viewer starts and stops watching, and tons of other cool stuff, the Zapier integration for the iDecide Back Office will allow you to organize and utilize that information in your favorite applications.
Get Started #
1.) Log into your iDecide Back Office & Watch your Presentation
• Accesso to your iDecide Back Office
• If you do not already have access to a presentation, add your iDecide iD by clicking ACCOUNT > ADD PRESENTATIONS (If you need help finding your iDecide iD, contact the company you are working with or email: Hi@iDecide.com)
Be sure to send and watch through your presentation at least once, Zapier will not be able to capture any data until you do so!
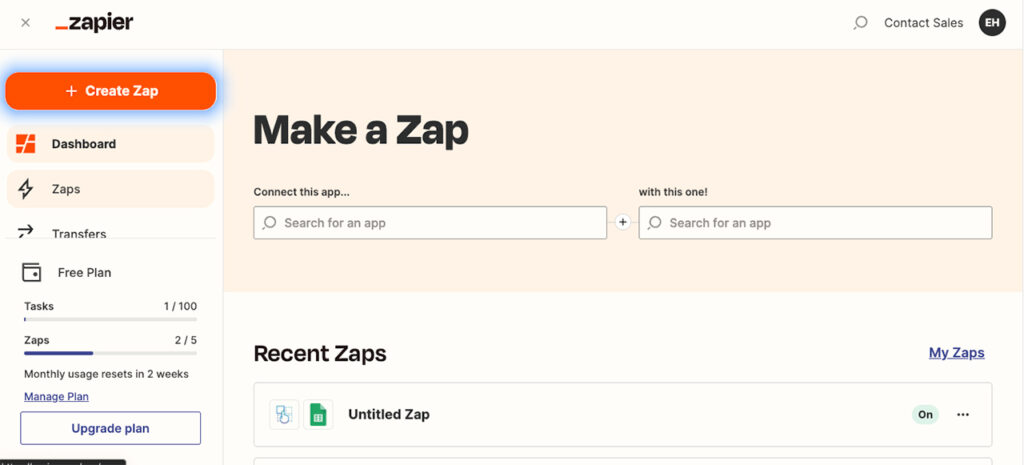
How to Use Zapier with iDecide #
Zapier can take the information provided by iDecide and do tons of cool things with it, like send an email, or update a contact in your CRM! Zapier can also react to actions that you take in your iDecide Back Office, or any other connected app, and cause a whole other chain of events to happen. For our examples we’ll use Monday.com, but you can use your favorite apps!
What info does iDecide provide and what does it mean? #
- ID – This is the viewer’s unique view ID.
- iDecidere – This is the name of the presentation you sent.
- Date/Time Started Watching – Provides an accurate time stamp the viewer started watching the link you sent.
- Was Post-A-Link – These types of presentations are usually posted on social media where many people will see it. If your link was sent this way, this field will say “true”.
- Viewer’s Full Name – Use this to input the viewer’s full name. This can also be separated into first name or last name only.
- Viewer’s Email Address – If one is provided, this will show the email address of the viewer.
- Viewer’s Phone Number – As long as one is provided, Zapier can funnel that info into your favorite apps.
- Viewer’s CRM-specific ID – This will be specific to the CRM you are using, as well as each specific contact. You’ll use this if you’d like to update your CRM with the info provided by iDecide.
- Choices Made – If there are tracked questions in the presentation, those options will appear here.
- Slides Viewed – This allows you to see what the viewer watched in the presentation so you can accurately cater to their experience.
- Outcome – This will be the option the viewer chose at the end of your presentation, whether that was to buy, go to your website, or anything else!
- Outcome Notification – This will be the same notification we send you via text/email when a viewer finishes watching a presentation. As an example for a use-case, you can use this field to send a team member a notification so they can respond!
- Event Title – This field gives a brief description of what caused the action and can be used to pinpoint exactly where a contact is at in your pipeline.
As simple examples we will cover automation of creating an iDecide link when a contact is created in your CRM as well as updating your CRM with information once the viewer watches your presentation.
Create A Link When A Contact Is Created #
1.) App: Search for your chosen CRM (we’ll use Monday.com here).
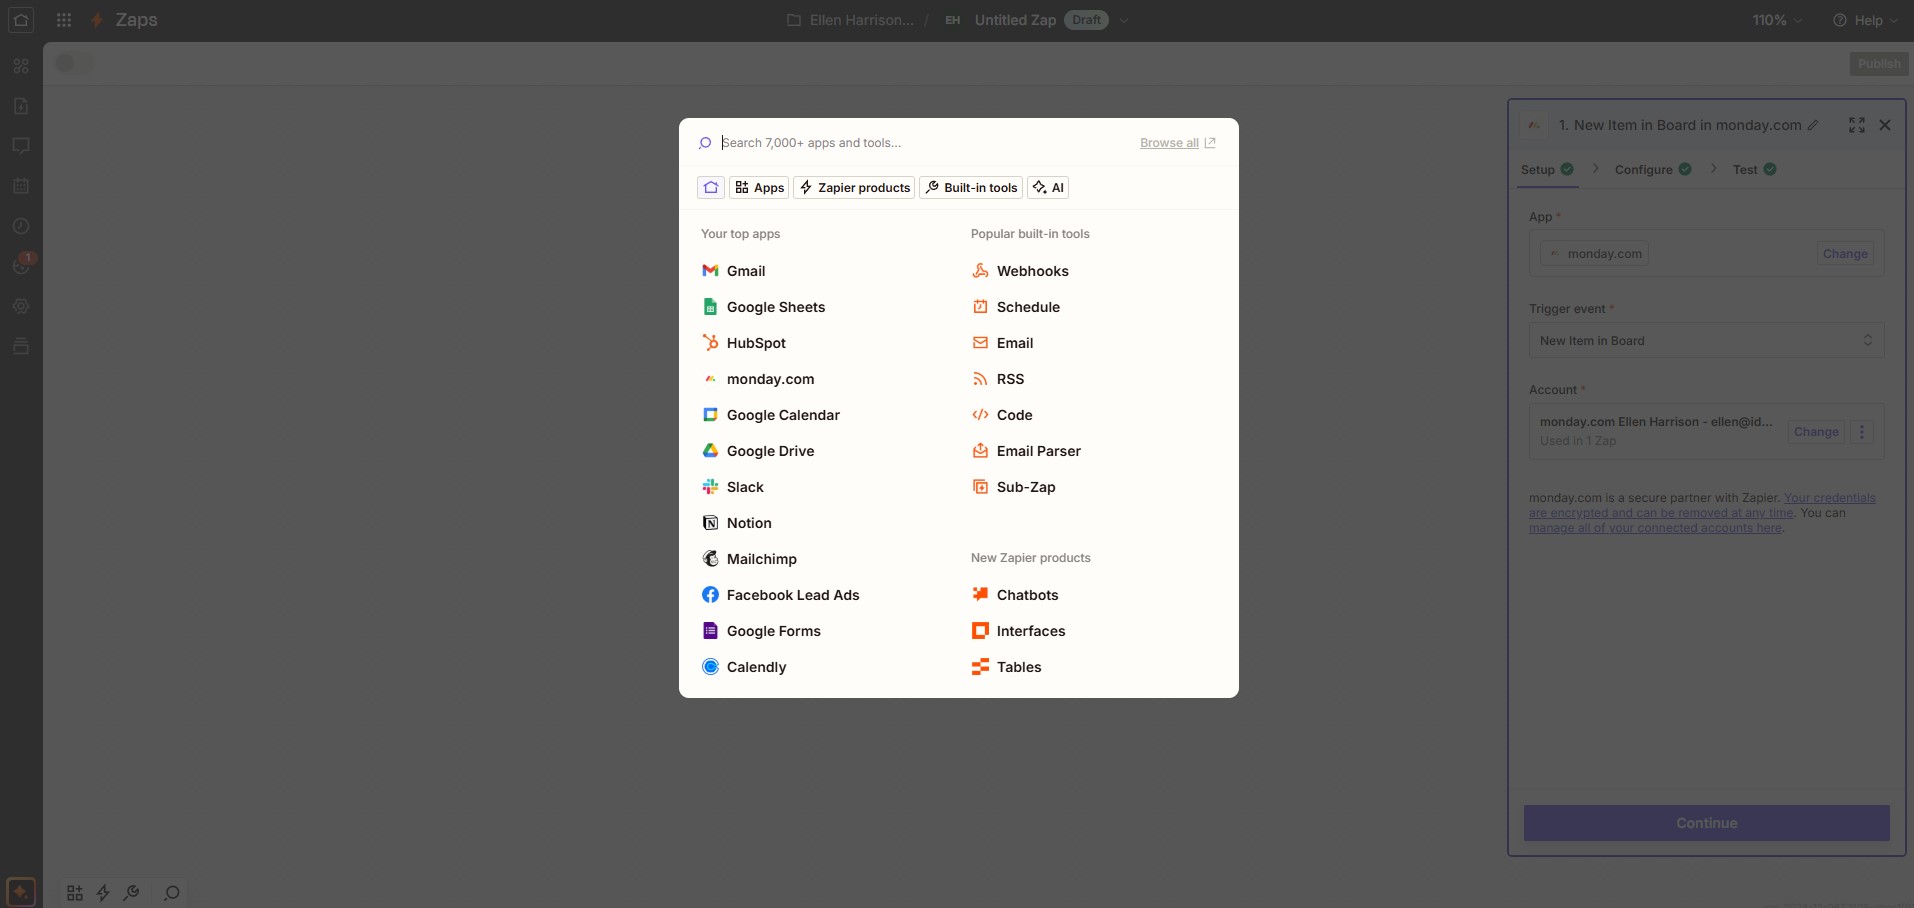
2.) Trigger Event: Select “New Item in Board”. Other CRM will use different terminology, but choose the option that is the most similar such as “New Contact” or “New Line”
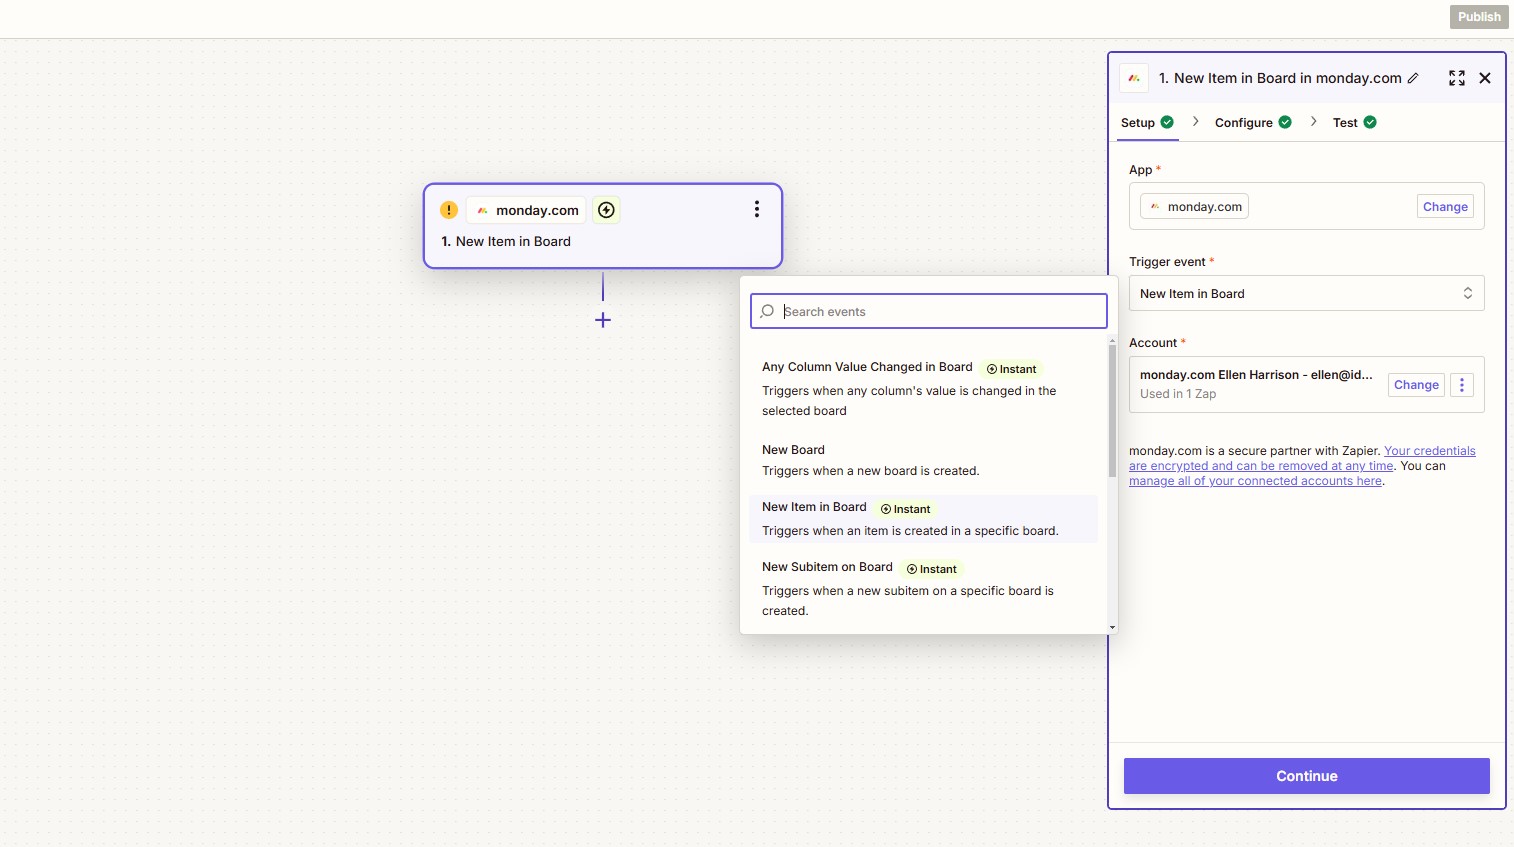
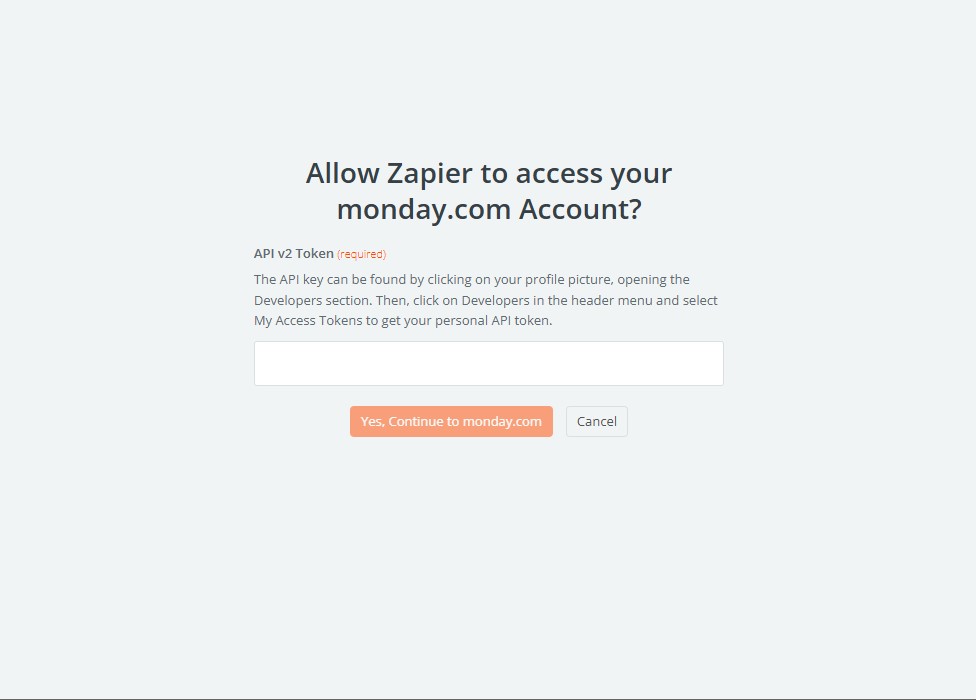
3.) Account: Log into your CRM here. Monday.com uses an API key found in the developer section under your profile picture on the Monday.com Back Office, but other CRM may have you sign in other ways. Be sure to note the instructions when your specific sign in window pops up.
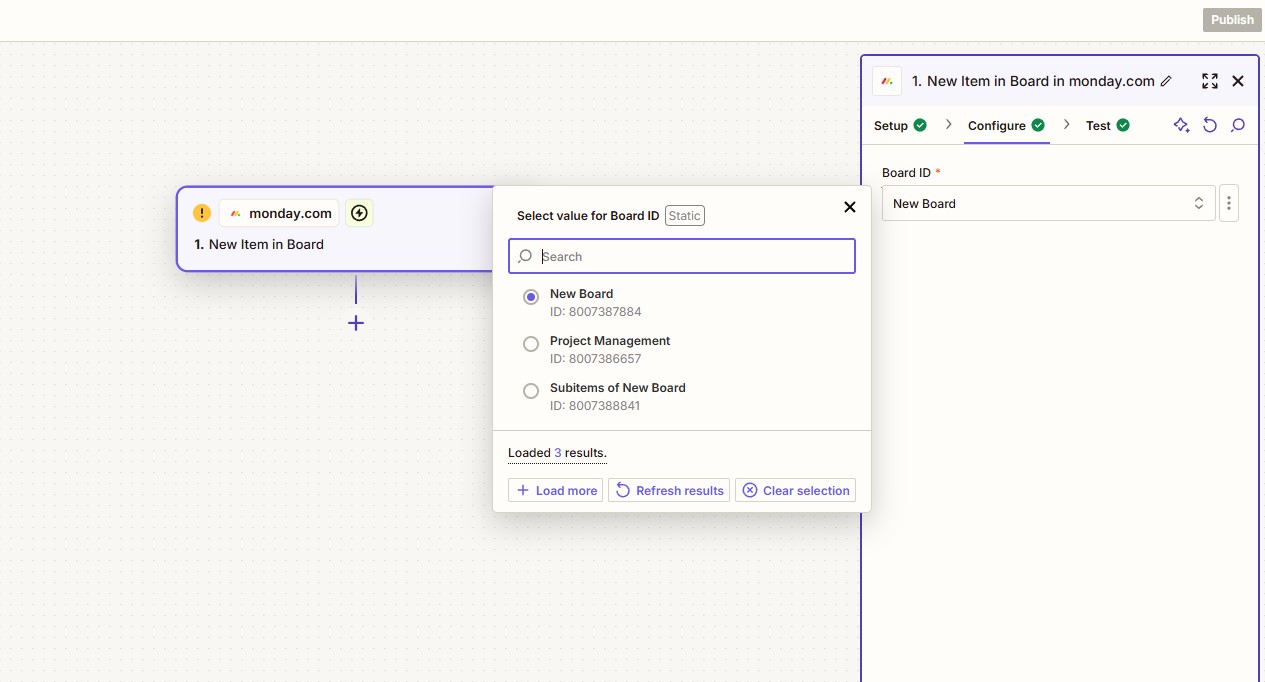
4.) Board ID: Choose the name of the board you would like to pull information from when creating this automated process.
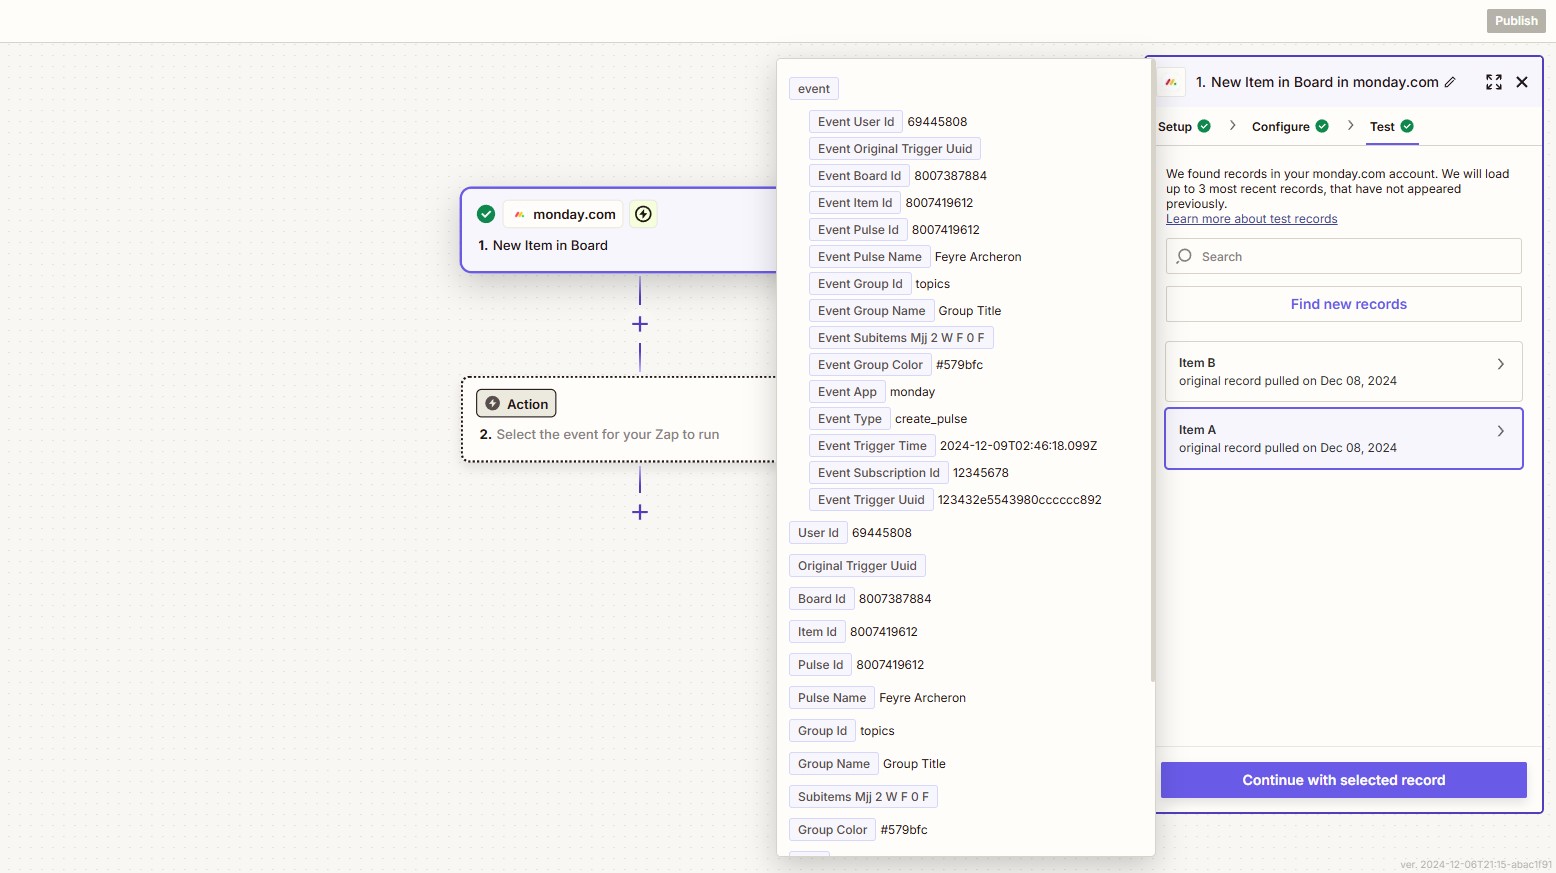
5.) Test Trigger: Add a contact to your CRM and click “Test Trigger”. You’ll be able to see the information from the CRM and the contact you just added. Choose a test record and click “Continue with Selected Record”.
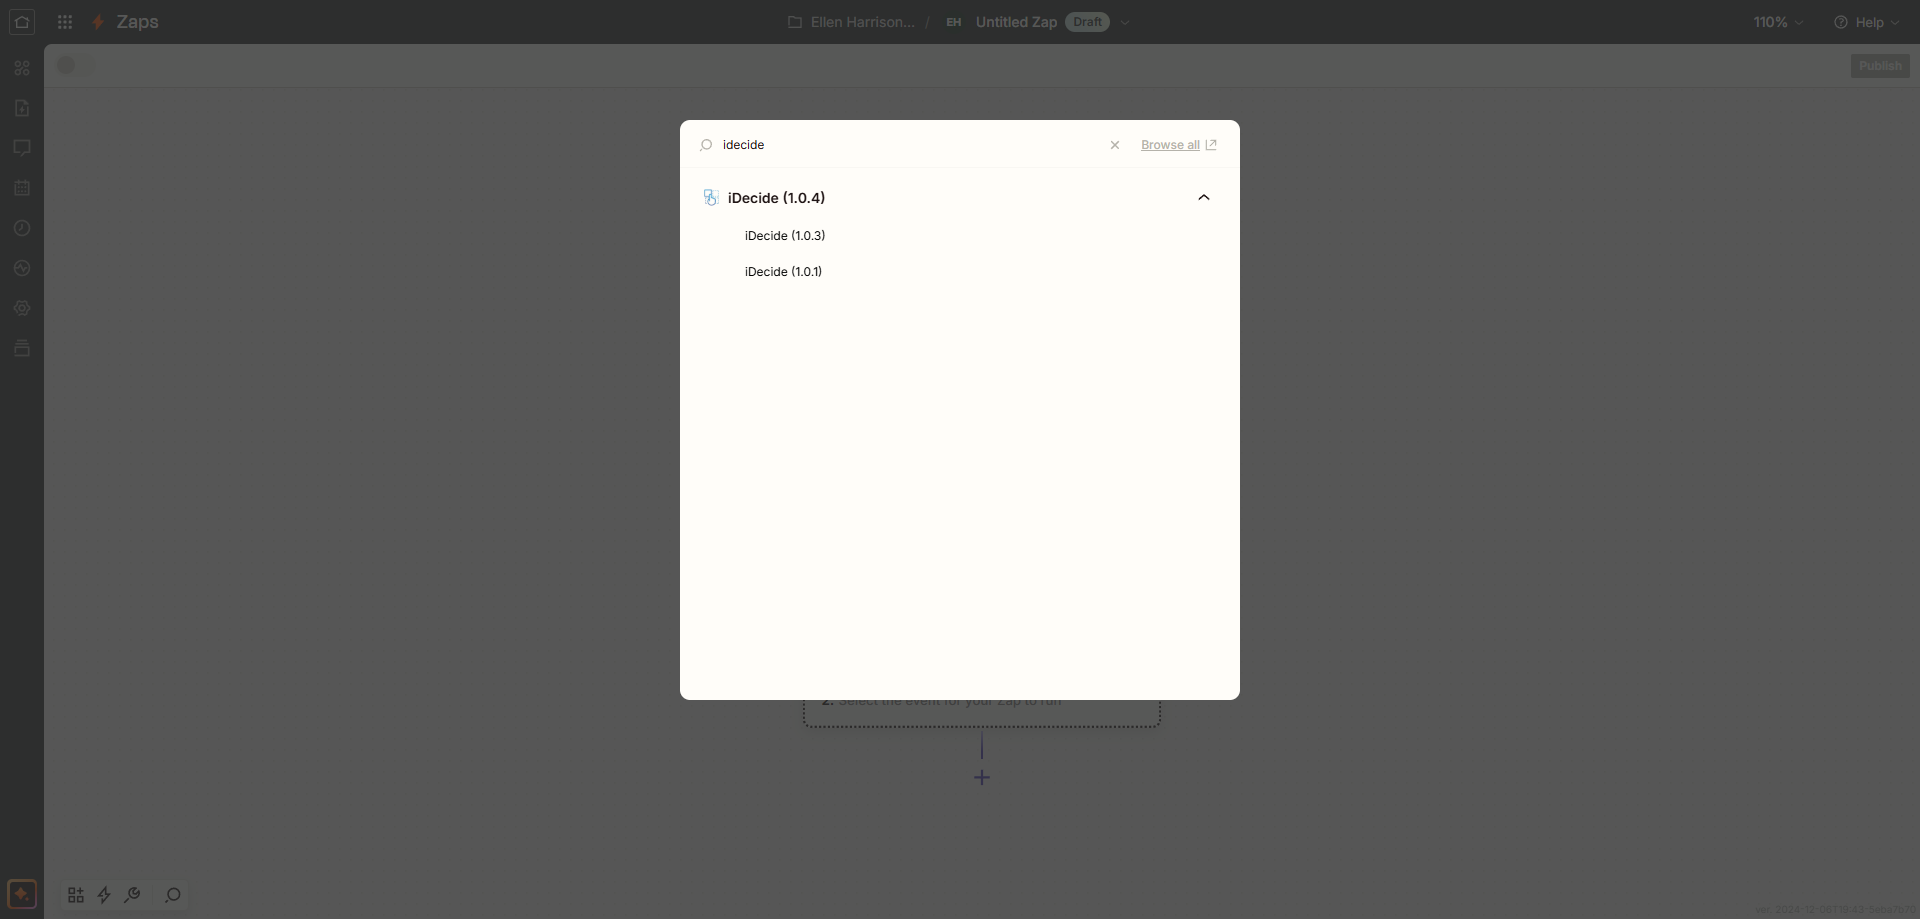
6.) Action: Create a second step, search for “iDecide”, and select the latest version
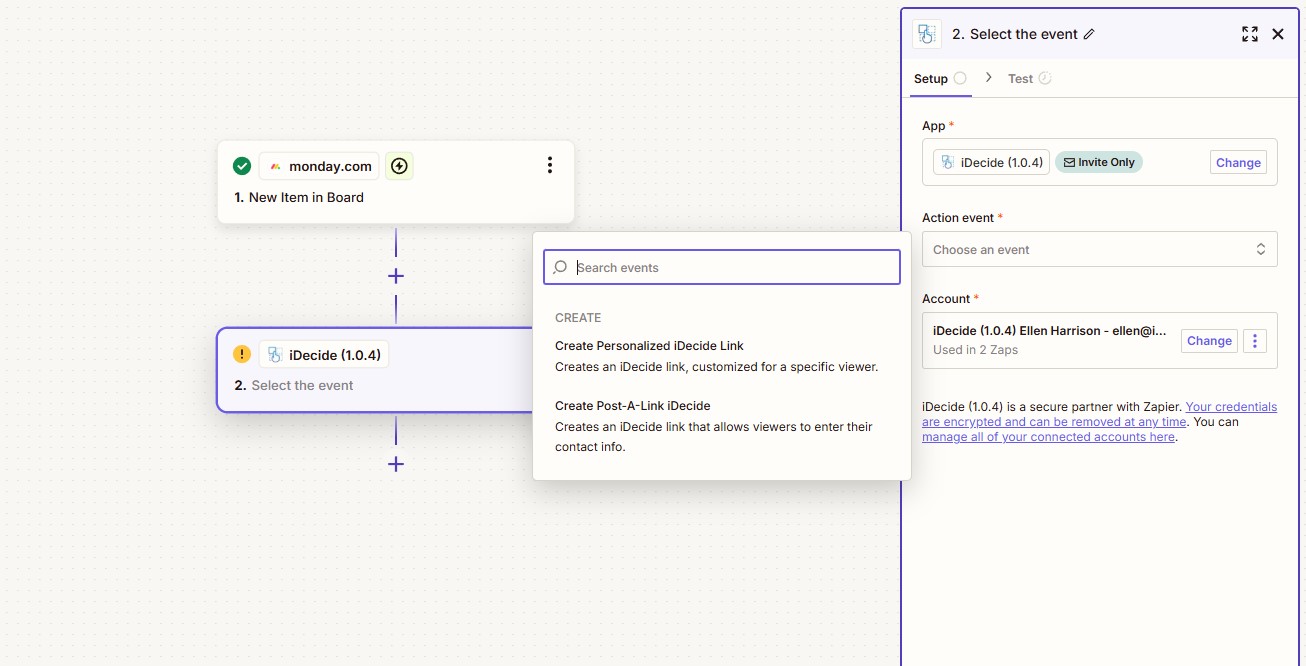
7.) Action Event: Select “Create Personalized iDecide Link”
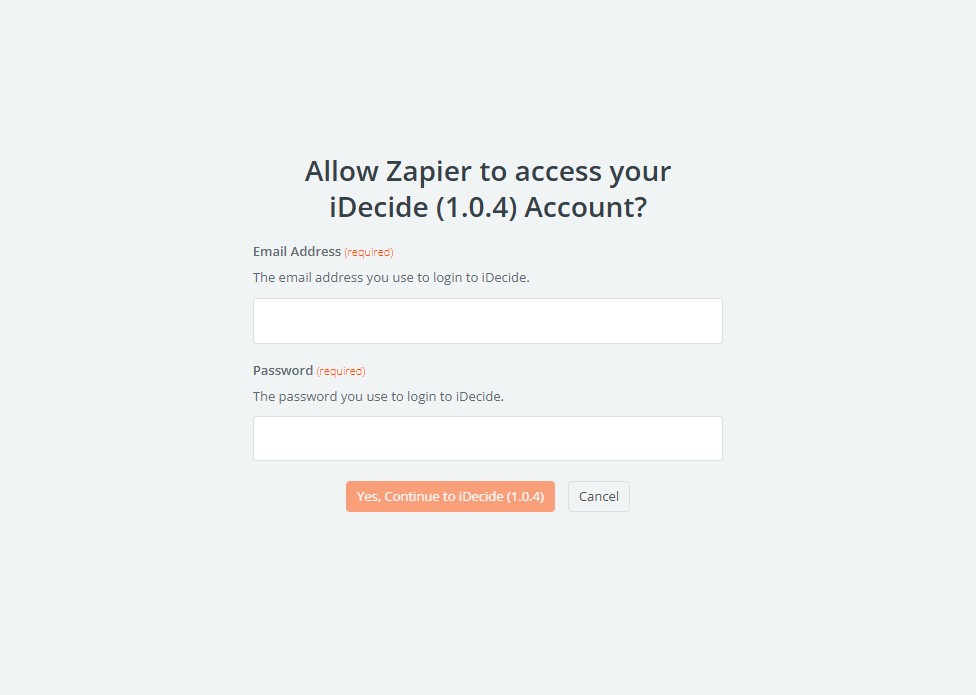
8.) Account: Take note of the instructions here and sign in to your iDecide Back Office to connect it to Zapier.
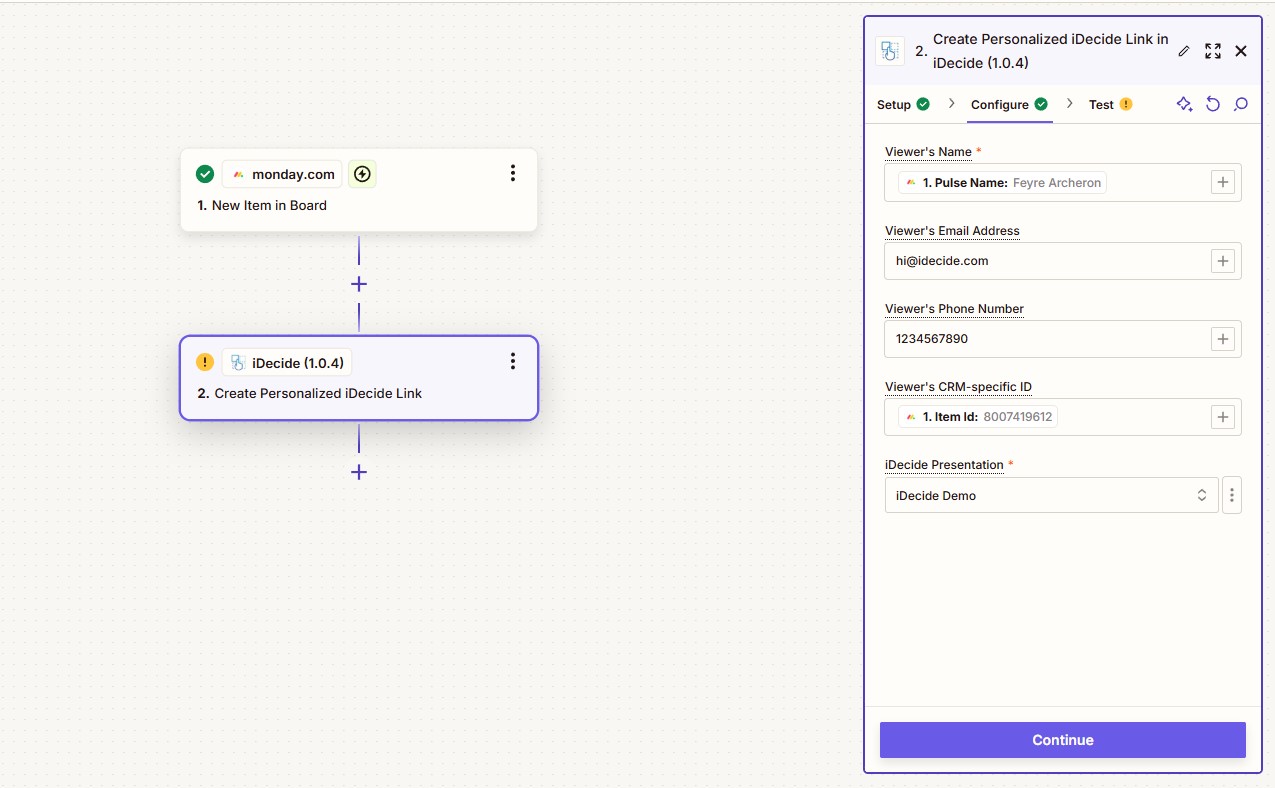
9.) Configure: Select the appropriate information for each of the fields here. The only required fields are the viewer’s name and the iDecide presentation you’d like to send. Once you’re done here, select “Continue”
10.) Test: Here you can test your action and see that Zapier will take the name and any other information added to your CRM and create a personalized iDecide link ready to send or add to your CRM.
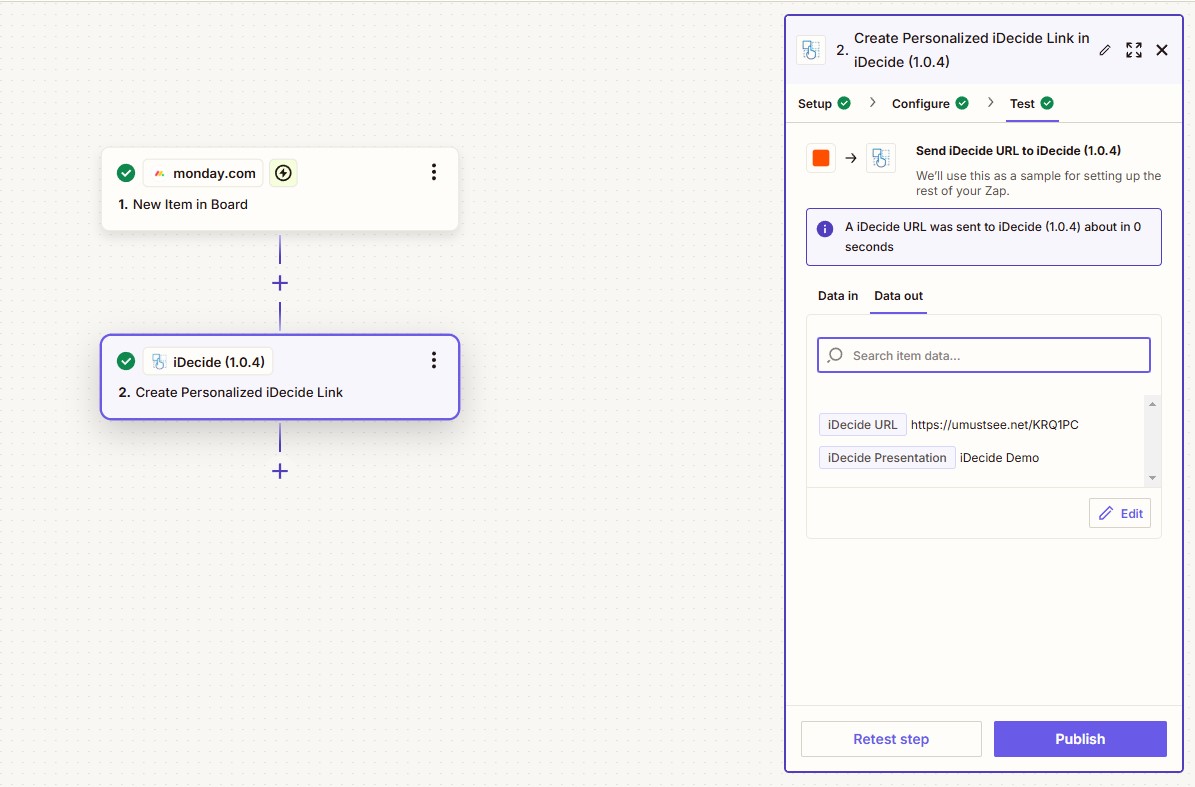
IMPORTANT: Stopping here ONLY CREATES the link. In order for Zapier to know where to put this link, you MUST add a third step. This step can update your CRM with the link you just created, send you an email with that link attached, even send that link to the viewer so they can view it immediately!
11.) App: Select the CRM you used in the first step for creating the contact.
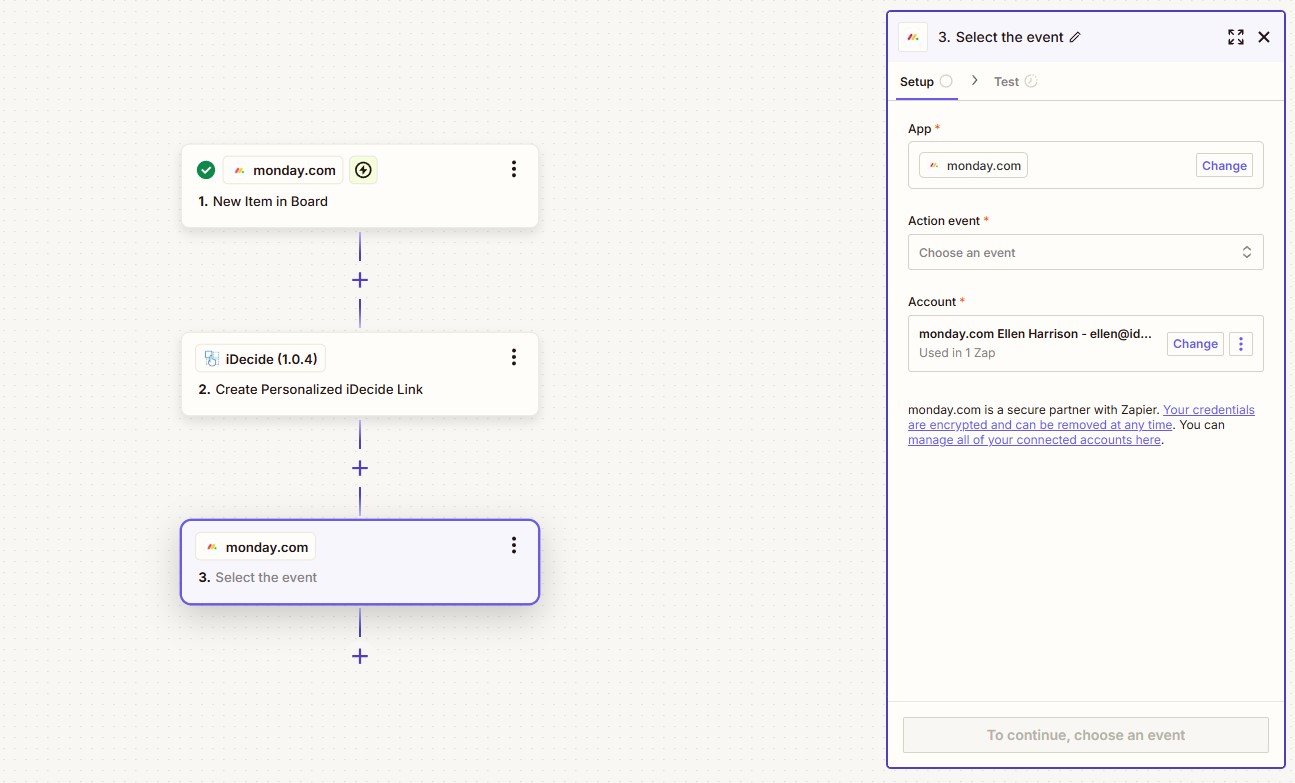
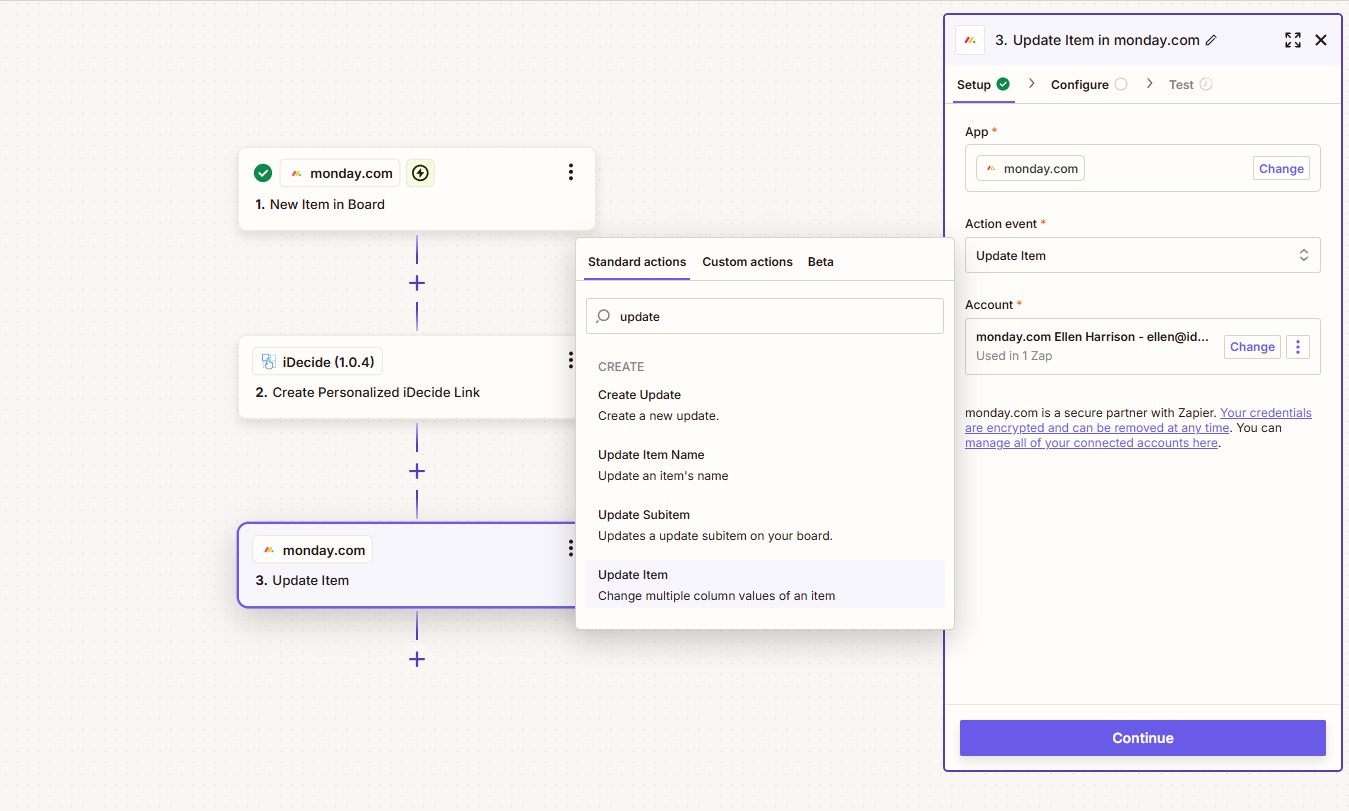
12.) Action: For Monday.com, select “Update Item”. Other CRM’s will use different terminology, but here, this will update the contact you already created.
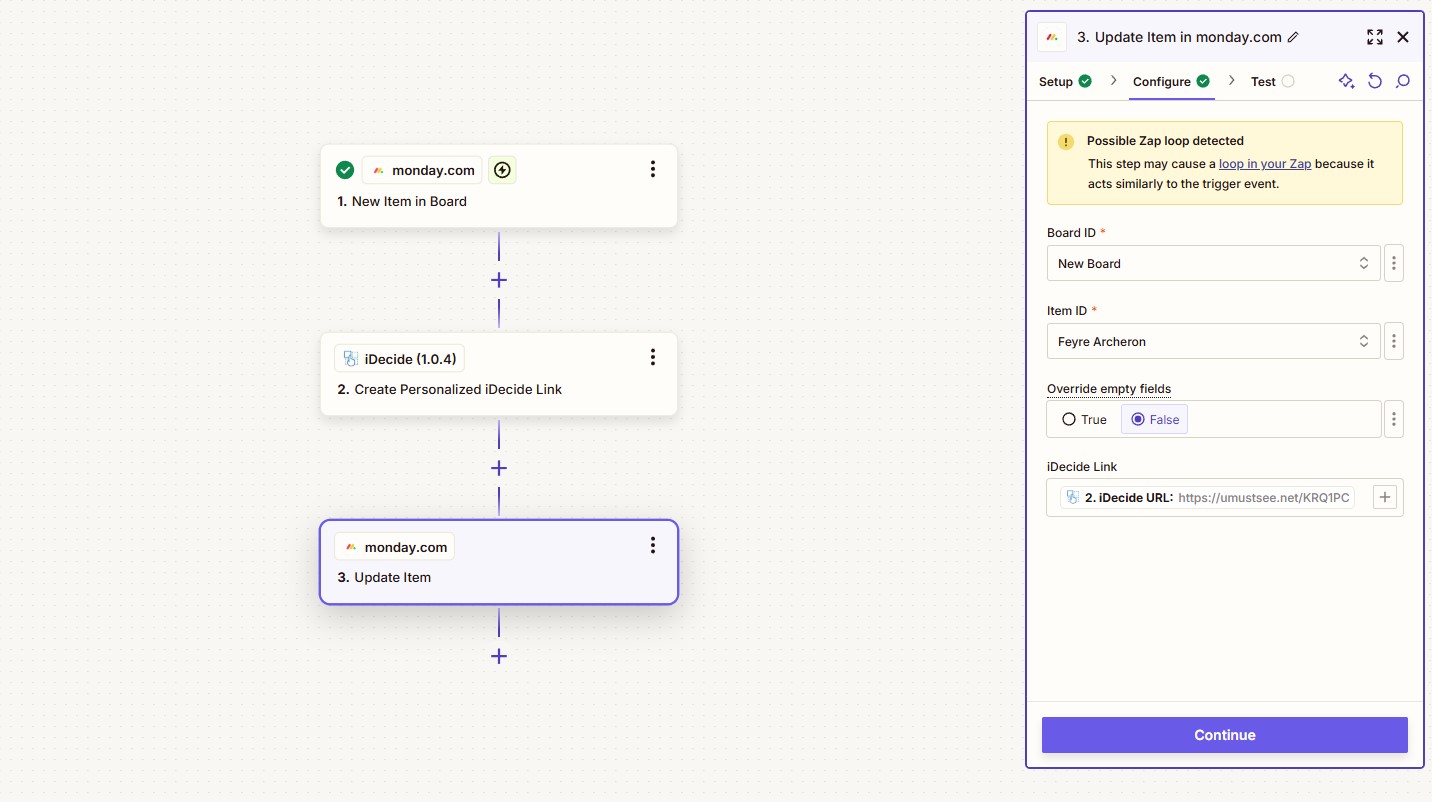
13.) Configure: Select the board and contact you used in the first step. Then select the iDecide URL to input into the field you created in the contact. You can also choose to replace information in the field even if it’s already filled in.
14.) Test: When you choose to test here, Zapier should automatically create a personalized iDecide link using the information added to your CRM, and then should update the CRM with the link that was created.
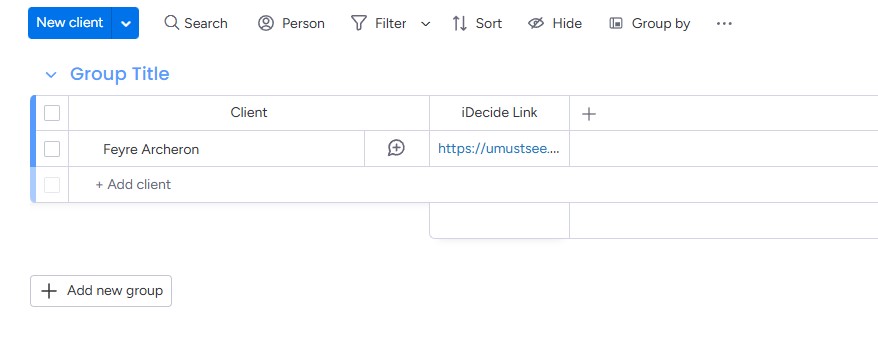
15.) Publish your zap and you’re good to go! As you create contacts in your CRM, those contacts will automatically be updated with a personalized link that you can now send straight to them!

Update Your CRM When A Presentation Is Watched #
1.) App: Search for “iDecide” and select the latest version

2.) Trigger Event: Choose “iDecide Finished”. This means this event will occur when your viewer has finished watching your presentation.
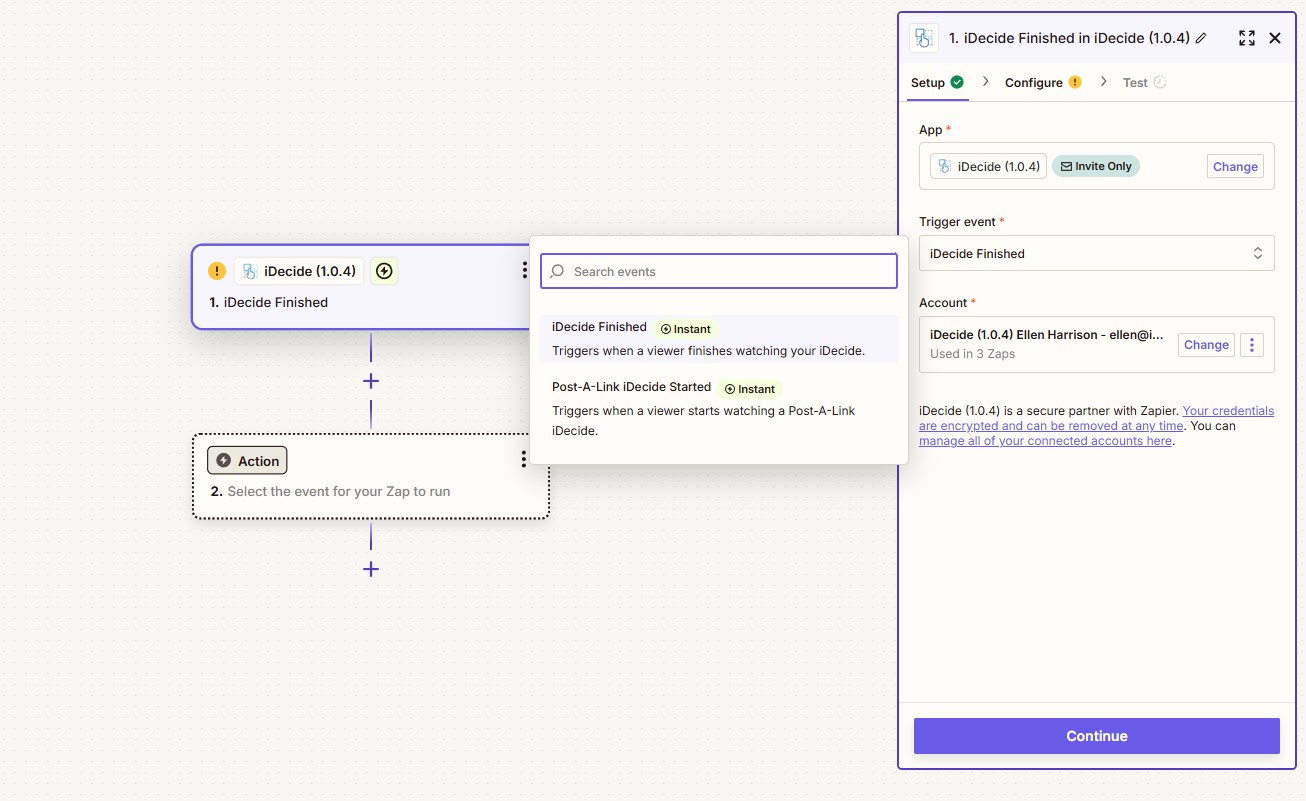
3.) Account: Be sure you’re logged into your iDecide Back Office.

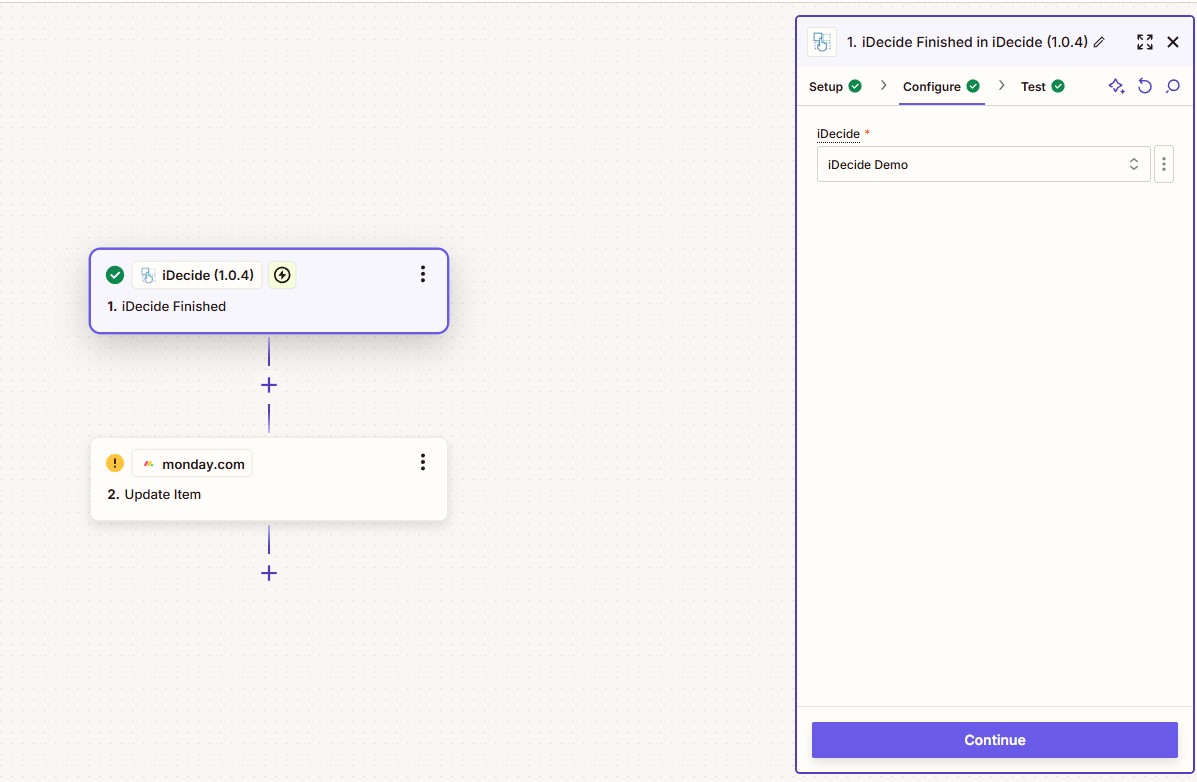
4.) Configure: Select the same iDecide as you did in your other zap.
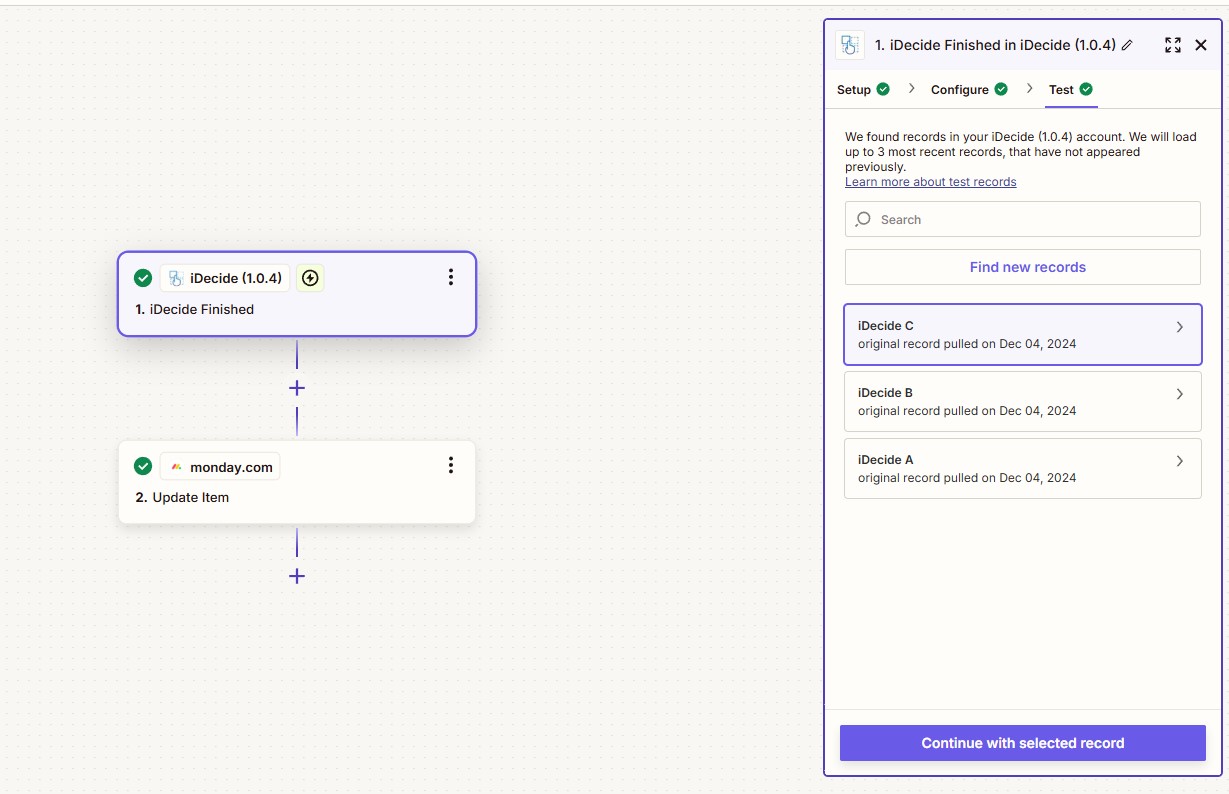
5.) Test: Here you will see all of the information iDecide gathers from each viewer as they watch. Select a record and then select “Continue with Selected Record”
6.) App: Add a second step and select the CRM you used in our first example.
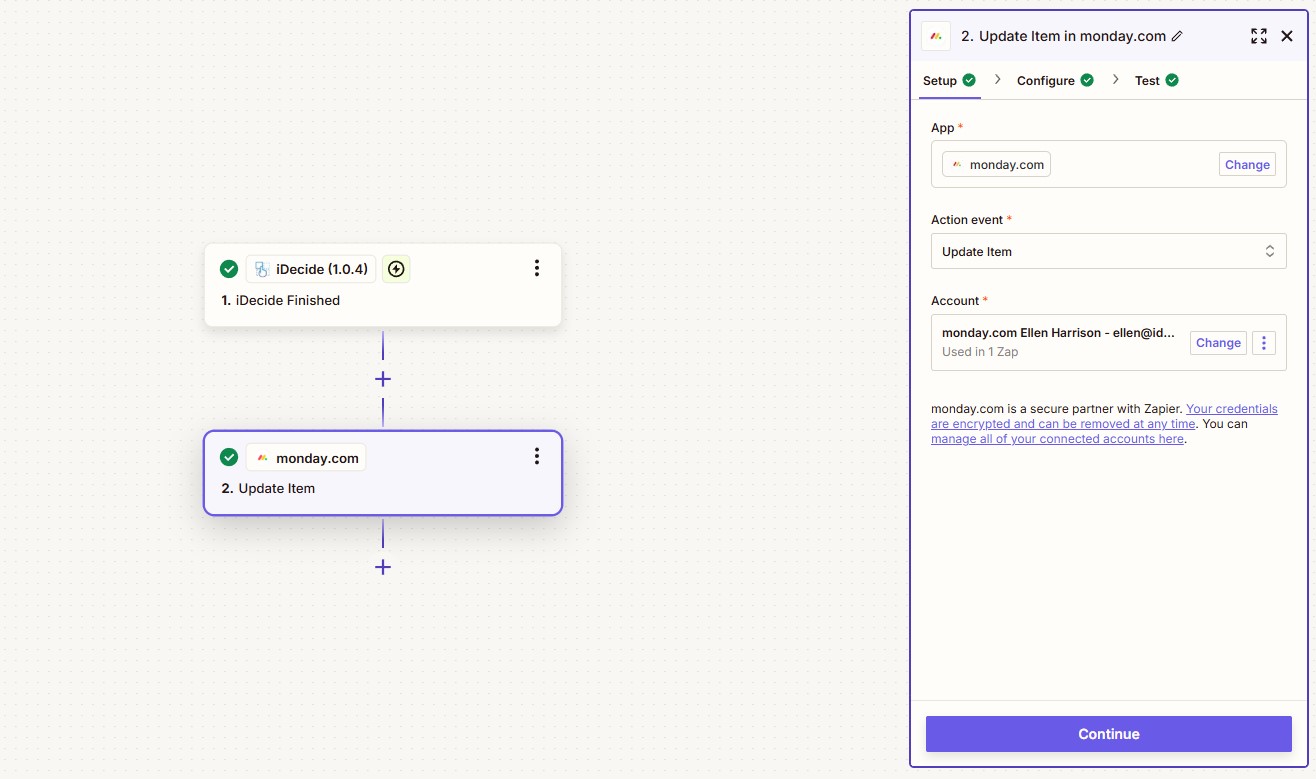
7.) Action: For Monday.com, select “Update Item”. Other CRM’s will use different terminology, but here, this will update the contact you already created.
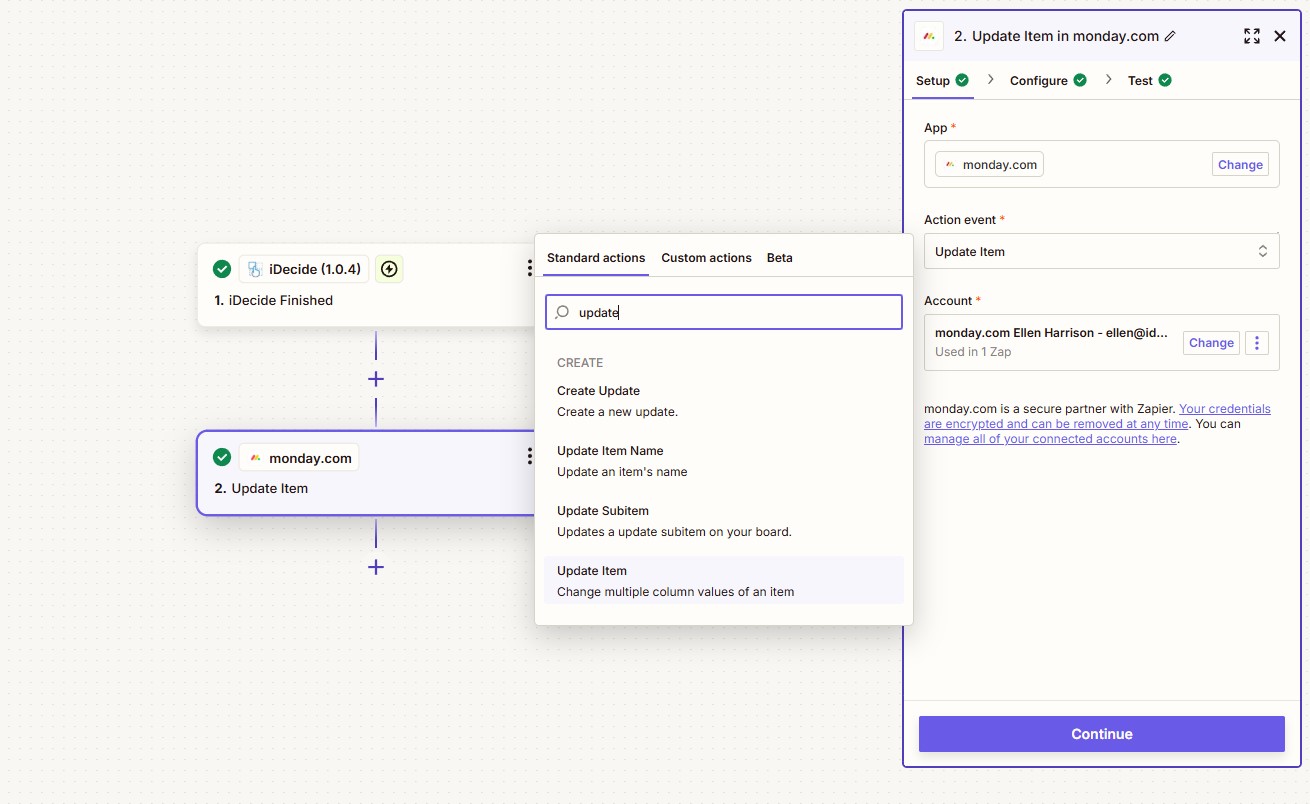
8.) Account: Be sure you’re logged into your CRM account connected through Zapier.

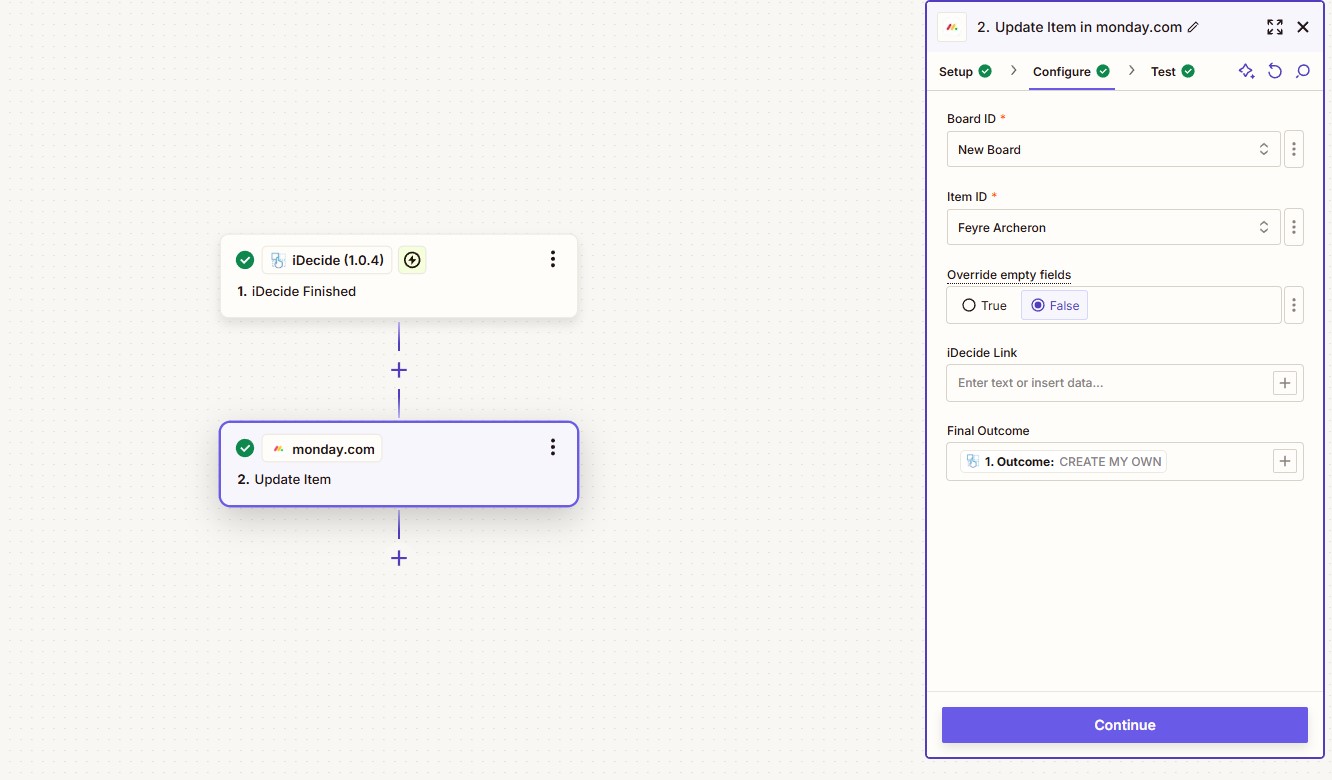
9.) Configure: Select the board and contact you used in the first step. This time, make sure you have a field created in your CRM for the outcome of the presentation, this is what the viewer chose to do at the end of a presentation and you may be able to follow up!
10.) Test: Test this step and your CRM should update with whatever information is provided by the test record you selected in the previous iDecide steps.
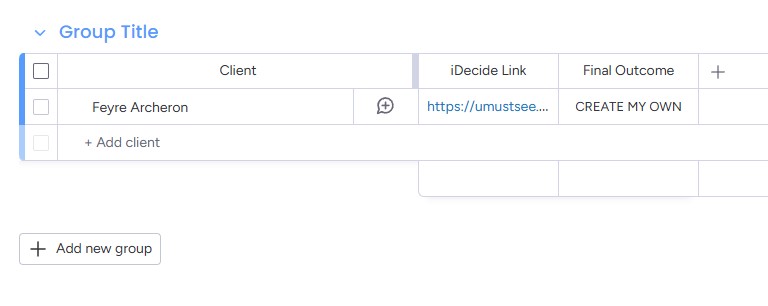
6.) Publish your zap and you’re good to go! As people watch your presentation, your CRM will automatically update!
A Few Tips #
– Be careful not to create a zap loop. This occurs when an action causes an event that fulfills the requirements for the original action, for example: update contact > send presentation > update contact. This zap would create a presentation everytime a contact in your CRM was updated. Then, when the personalized link is automatically added to your CRM, updating the contact, a new link is created, and the cycle repeats itself until all of your zaps are used up!
– DO utilize the built in Zapier tools. These will allow you to use the data from iDecide in even more specific ways! For example: the storage tool allows you to store data from one zap to use in a zap created later!
– You will probably need multiple zaps. Often, zaps will only have 2 steps, an action and an event. For example: Zap 1 creates a link when a contact is added to my CRM, and zap 2 will add the outcome to my CRM when that viewer finishes watching. Keep it simple! Do what makes sense to you.
– Things may not work right on the first try. Don’t worry, you can always edit your zaps and try again!
We’re always here to help. #
There are infinite numbers of ways to use Zapier and its integration with iDecide so we understand that can be overwhelming. If you have questions please reach out to us at Hi@iDecide.com
