Congratulations! You’re at the final stages of completing your presentation!
Reviewing Your Presentation #
In the review stage you’ll be able to watch and interact with your presentation just like your viewers will. This is an important part of the building process because it’s where you can catch and fix any errors or mishaps you may have missed.
A common mistake that’s often caught at this stage is that your slides or buttons don’t navigating to where you intended.
Example 1: Your Main Menu button doesn’t lead to the correct section.
Example 2: You forgot to point the last slide of a section back to the Main Menu so it’s going straight to the next section.
How do I use the Review screen? #
This screen is designed to help you easily go through your presentation with a “fine tooth comb.”
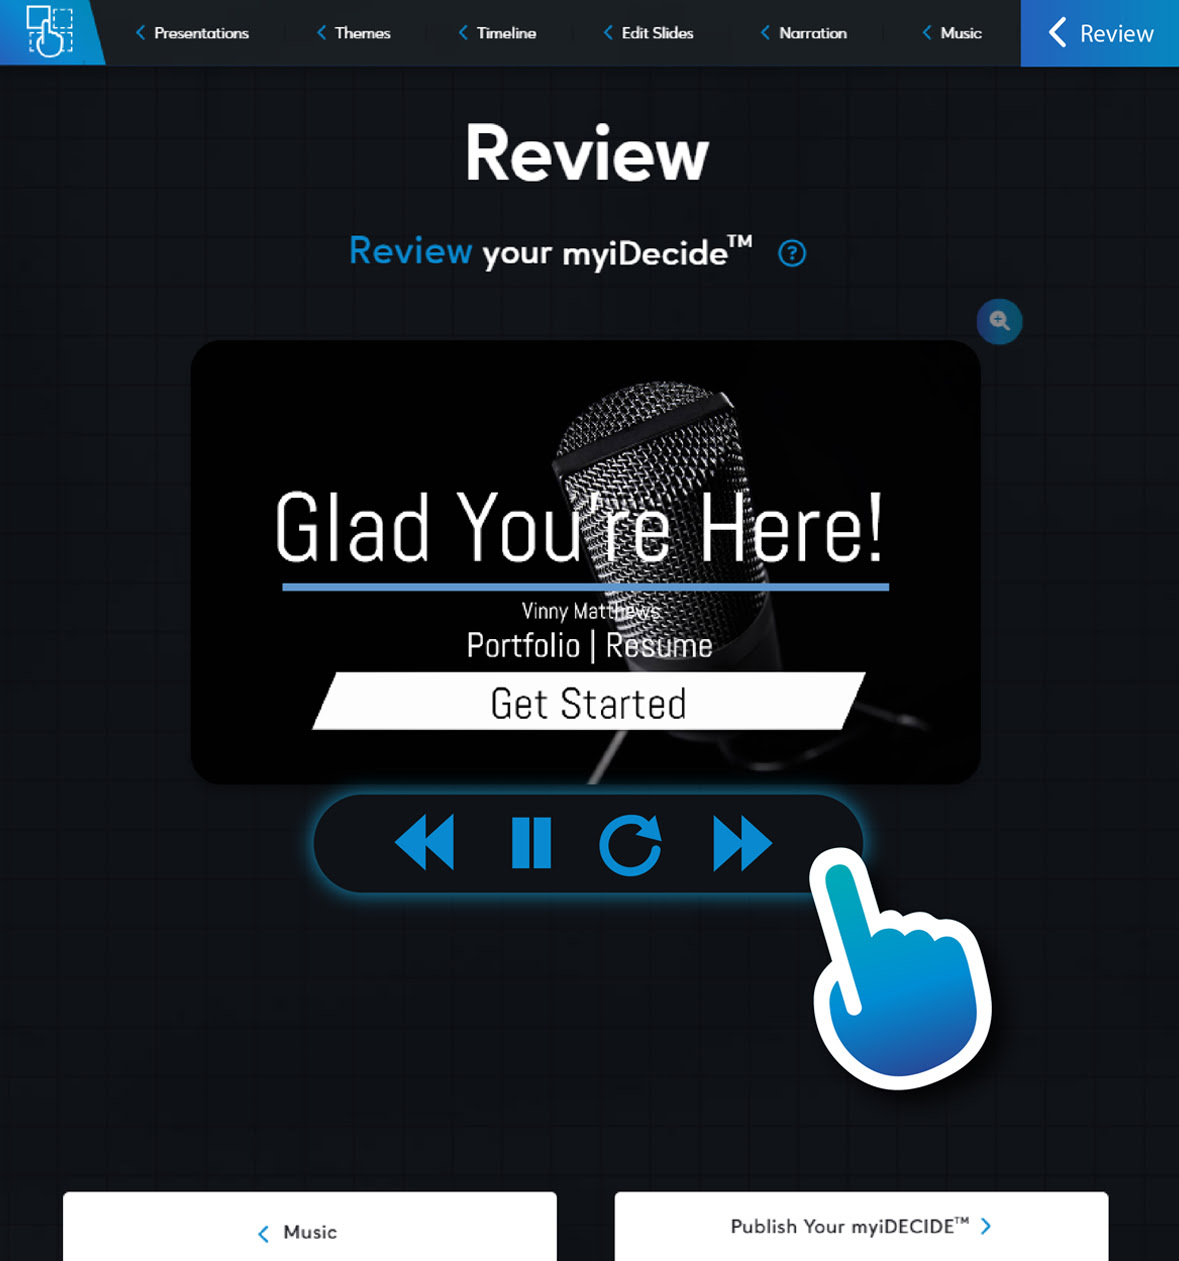
On the review screen you’ll see the preview window, where you’ll be able to watch and interact with your presentation just as your viewer will. You can make this bigger by clicking the magnifying glass in the upper righthand corner of that screen.
Below the preview screen are controls to navigate through the presentation quickly. The forward and back arrows skip to the next or previous slide on the timeline (note: this will be in the linear order of the timeline, regardless of slide destinations or button targets). The pause button stops the presentation on the current slide, and the curved arrow restarts the presentation from the Intro Slide.
Pro Tip: Use these buttons after you leave the review screen to make edits so you can skip ahead instead of watching the full presentation each time.
At the bottom you’ll see the “Publish Your myiDecide” button to move onto the final step, or the “Back to Timeline Editor” so you can easily make any changes you catch during your review.

Can I make edits after I leave the review step? #
We get it — the first myiDecide is always the hardest. We actually recommend making edits after you publish your myiDecide. Get feedback from prospects and make updates to increase close rates! You are allowed to make edits and republish your myiDecide as many times as you’d like, at any time you’d like! And when you do edit your content after publishing, any links you’ve sent will automatically be updated in real time! We know, that’s cool!
iDecide is here to help! #
You’re bound to edit, correct, and alter your presentation’s content after reviewing it for the first time. The important thing is… YOU CAN DO THAT… and so can we! Should you find yourself stuck or suffering from a creative block, we offer an upgrade called “Assistenza iDecide!” You can upgrade anytime and our iDesigners will build your presentation. All you have to do is answer a short questionnaire and upload any marketing material you’d like us to use. It’s that simple!
Publishing Your Presentation #
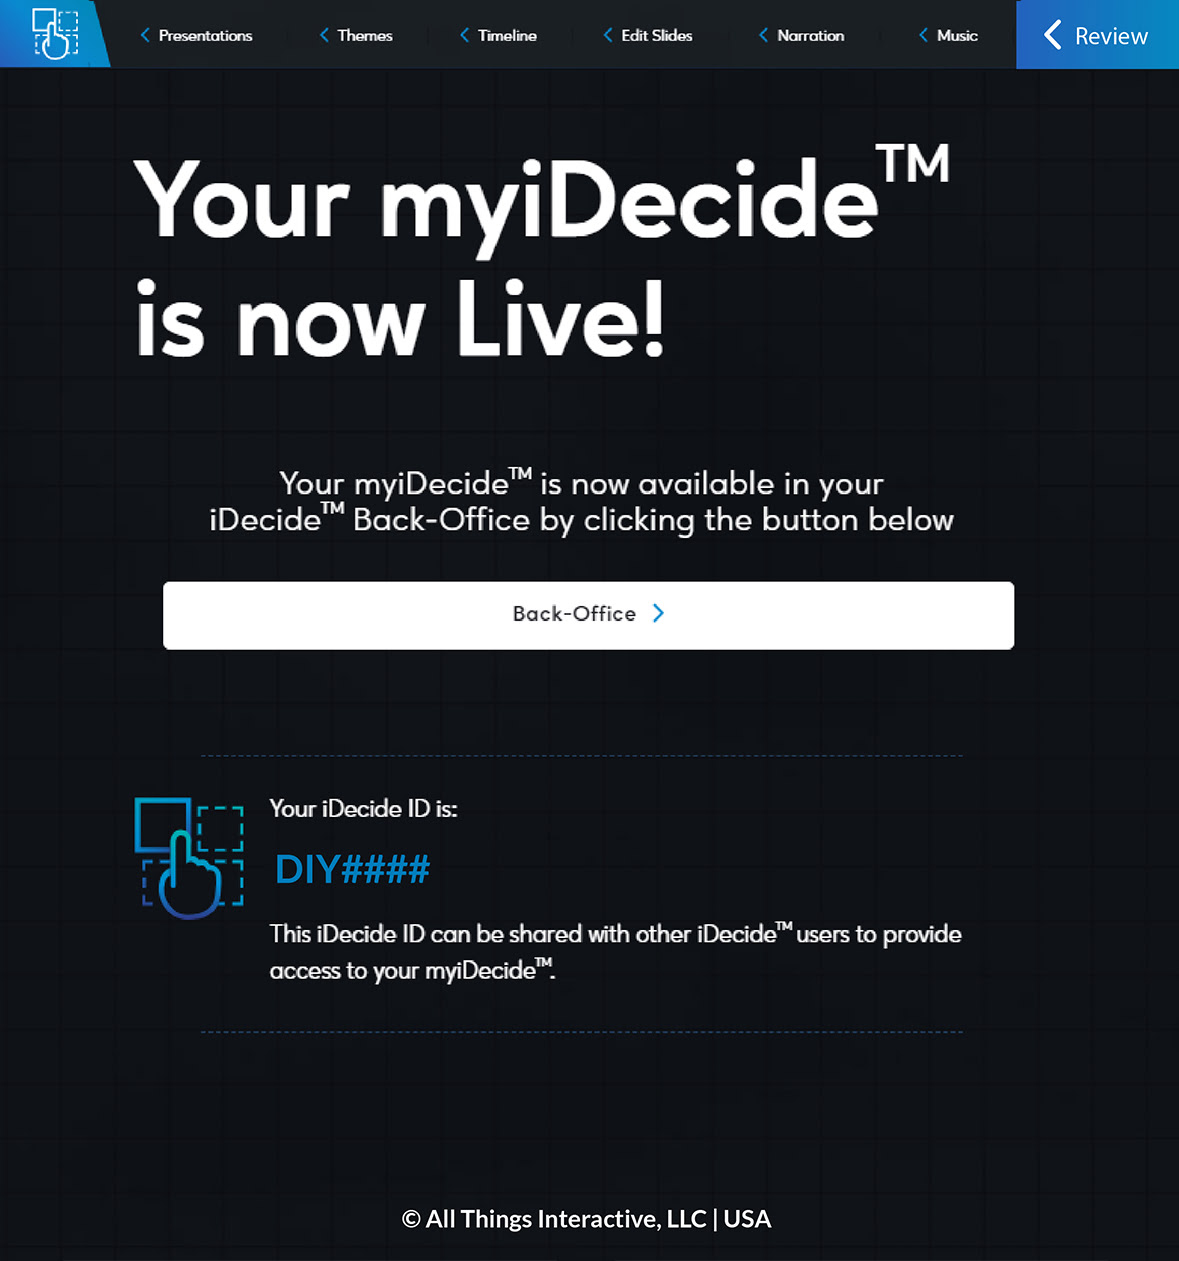
After clicking the “Publish Your myiDecide” button on the Review step, you’ll see a success screen that looks like this:
Your iDecide ID #
You may have heard the term “iDecide ID” before but if not, an iDecide ID is a unique sharable “code” that allows other iDecide Subscribers to add your presentation to their account if you’d like… without having to pay for a presentation build!
Helpful note: If you forgot to copy your iDecide ID from the publish screen, you can find it on your myiDecide presentations list (click the iDecide logo in the top left corner of your navigation bar).
How do I add my presentation to my account? #
Once you publish your presentation, it is automatically added to your iDecide Back Office! There’s no need to add your own iDecide ID to your account. Simply click the Back-Office quicklink or login through our website to begin sending!

How to inviare a presentation?
After adding your presentation to your account, you’ll want to start sending people a link to view your presentation! This is incredibly easy to do! To generate a shareable link:
- – Find the “Post A link tab” in your back office.
- – Find the name of your presentation & click “Next”

A link will immediately be generated for you! There are plenty of different ways to share your presentation! Share your presentation via email, text, personal/ company website, Instagram, Twitter, linkedin, even QR codes! (QR codes are generated through 3rd party sites & software)
Helpful Tips & Tricks!
Do you have someone that wants to share your personal presentation? If your contact already has an iDecide Account, you can give them your iDecide ID so they can share your story!
(Important Note: Giving your contact an iDecide ID will NOT give them access to edit the chosen presentation.)
As said before, you can share your presentation in a multitude of ways, but perhaps the most interesting way to share your presentation would be a QR code! QR codes are a cool and instant way for someone to see your presentation simply by looking at the code through their phone camera! Imagine sharing your presentation by giving someone a business card with your QR code on it!

How to acquire a QR code? As of right now, we do not generate QR codes for presentations directly from our website; but we do hope that we can in the future! Luckily, in the age of technology, we can help you generate one using other resources!
We recommend using https://www.qr-code-generator.com/
-Go to the qr-code website
– Paste your generated presentation link
– Download the Jpg or Svg file
– Voila! EASY!

